Pea Coat Mock Up

edited.jpg

Jumped into the Pea Coat for the Manta Ray Uniform look.

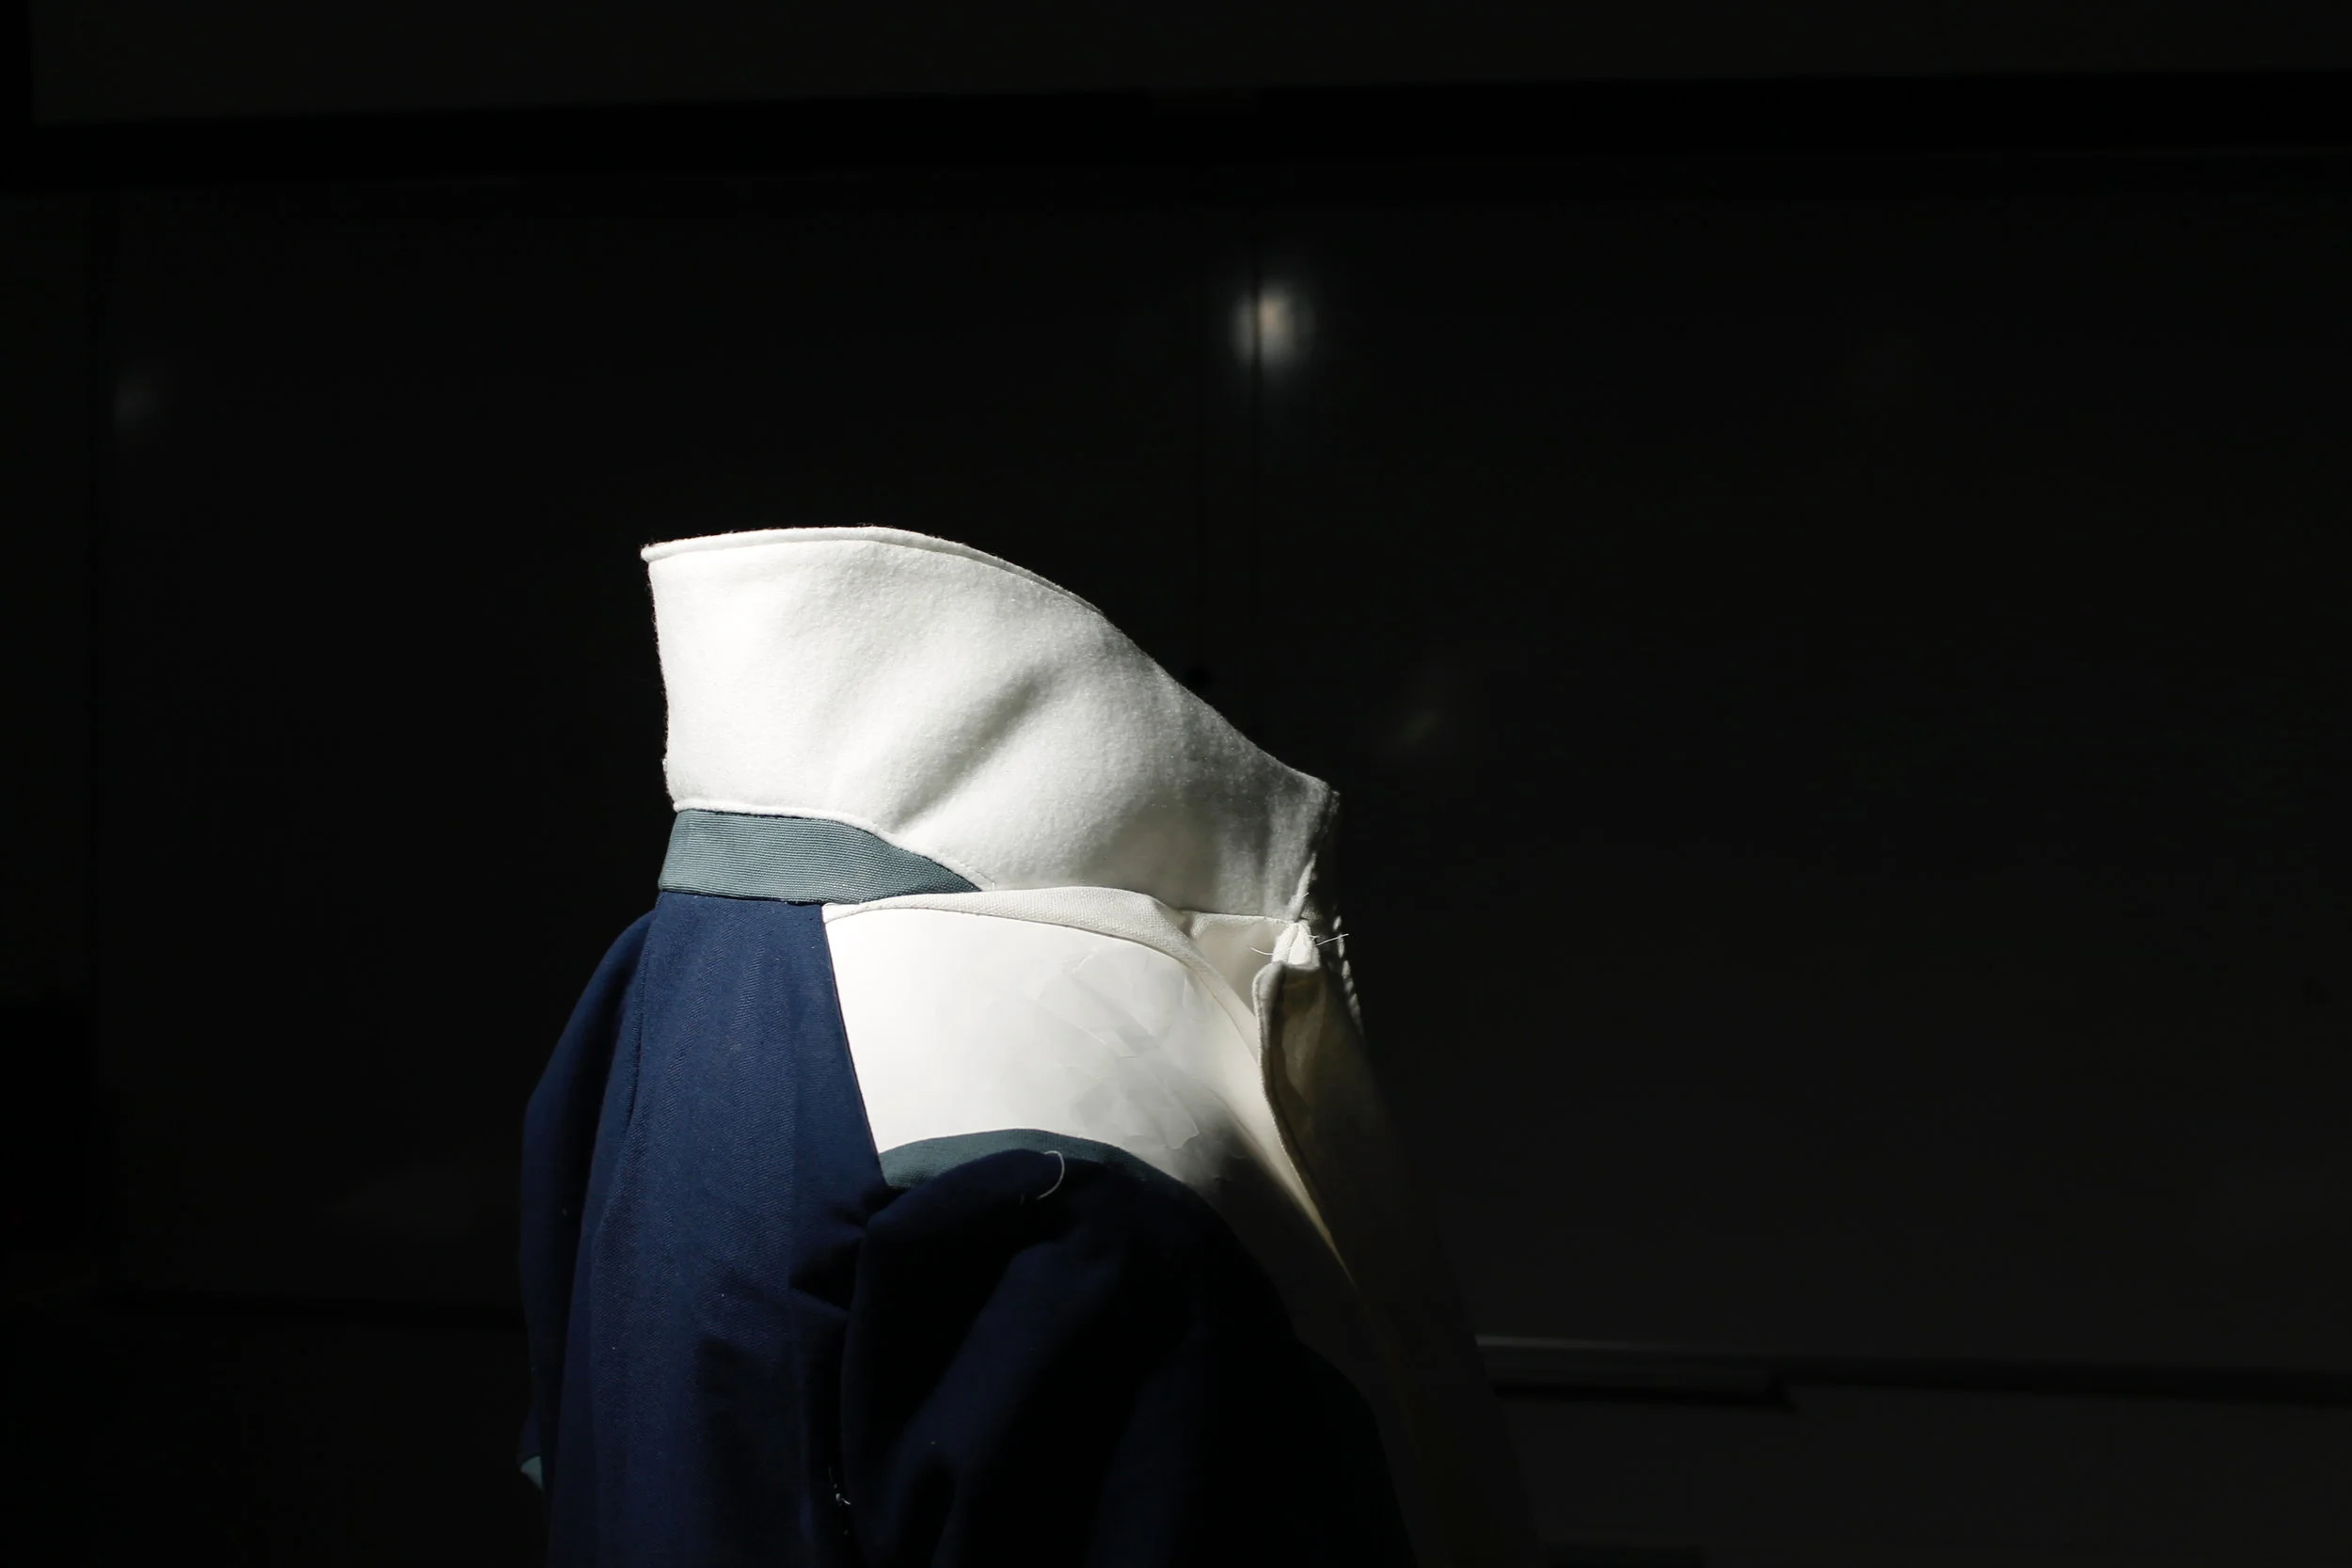
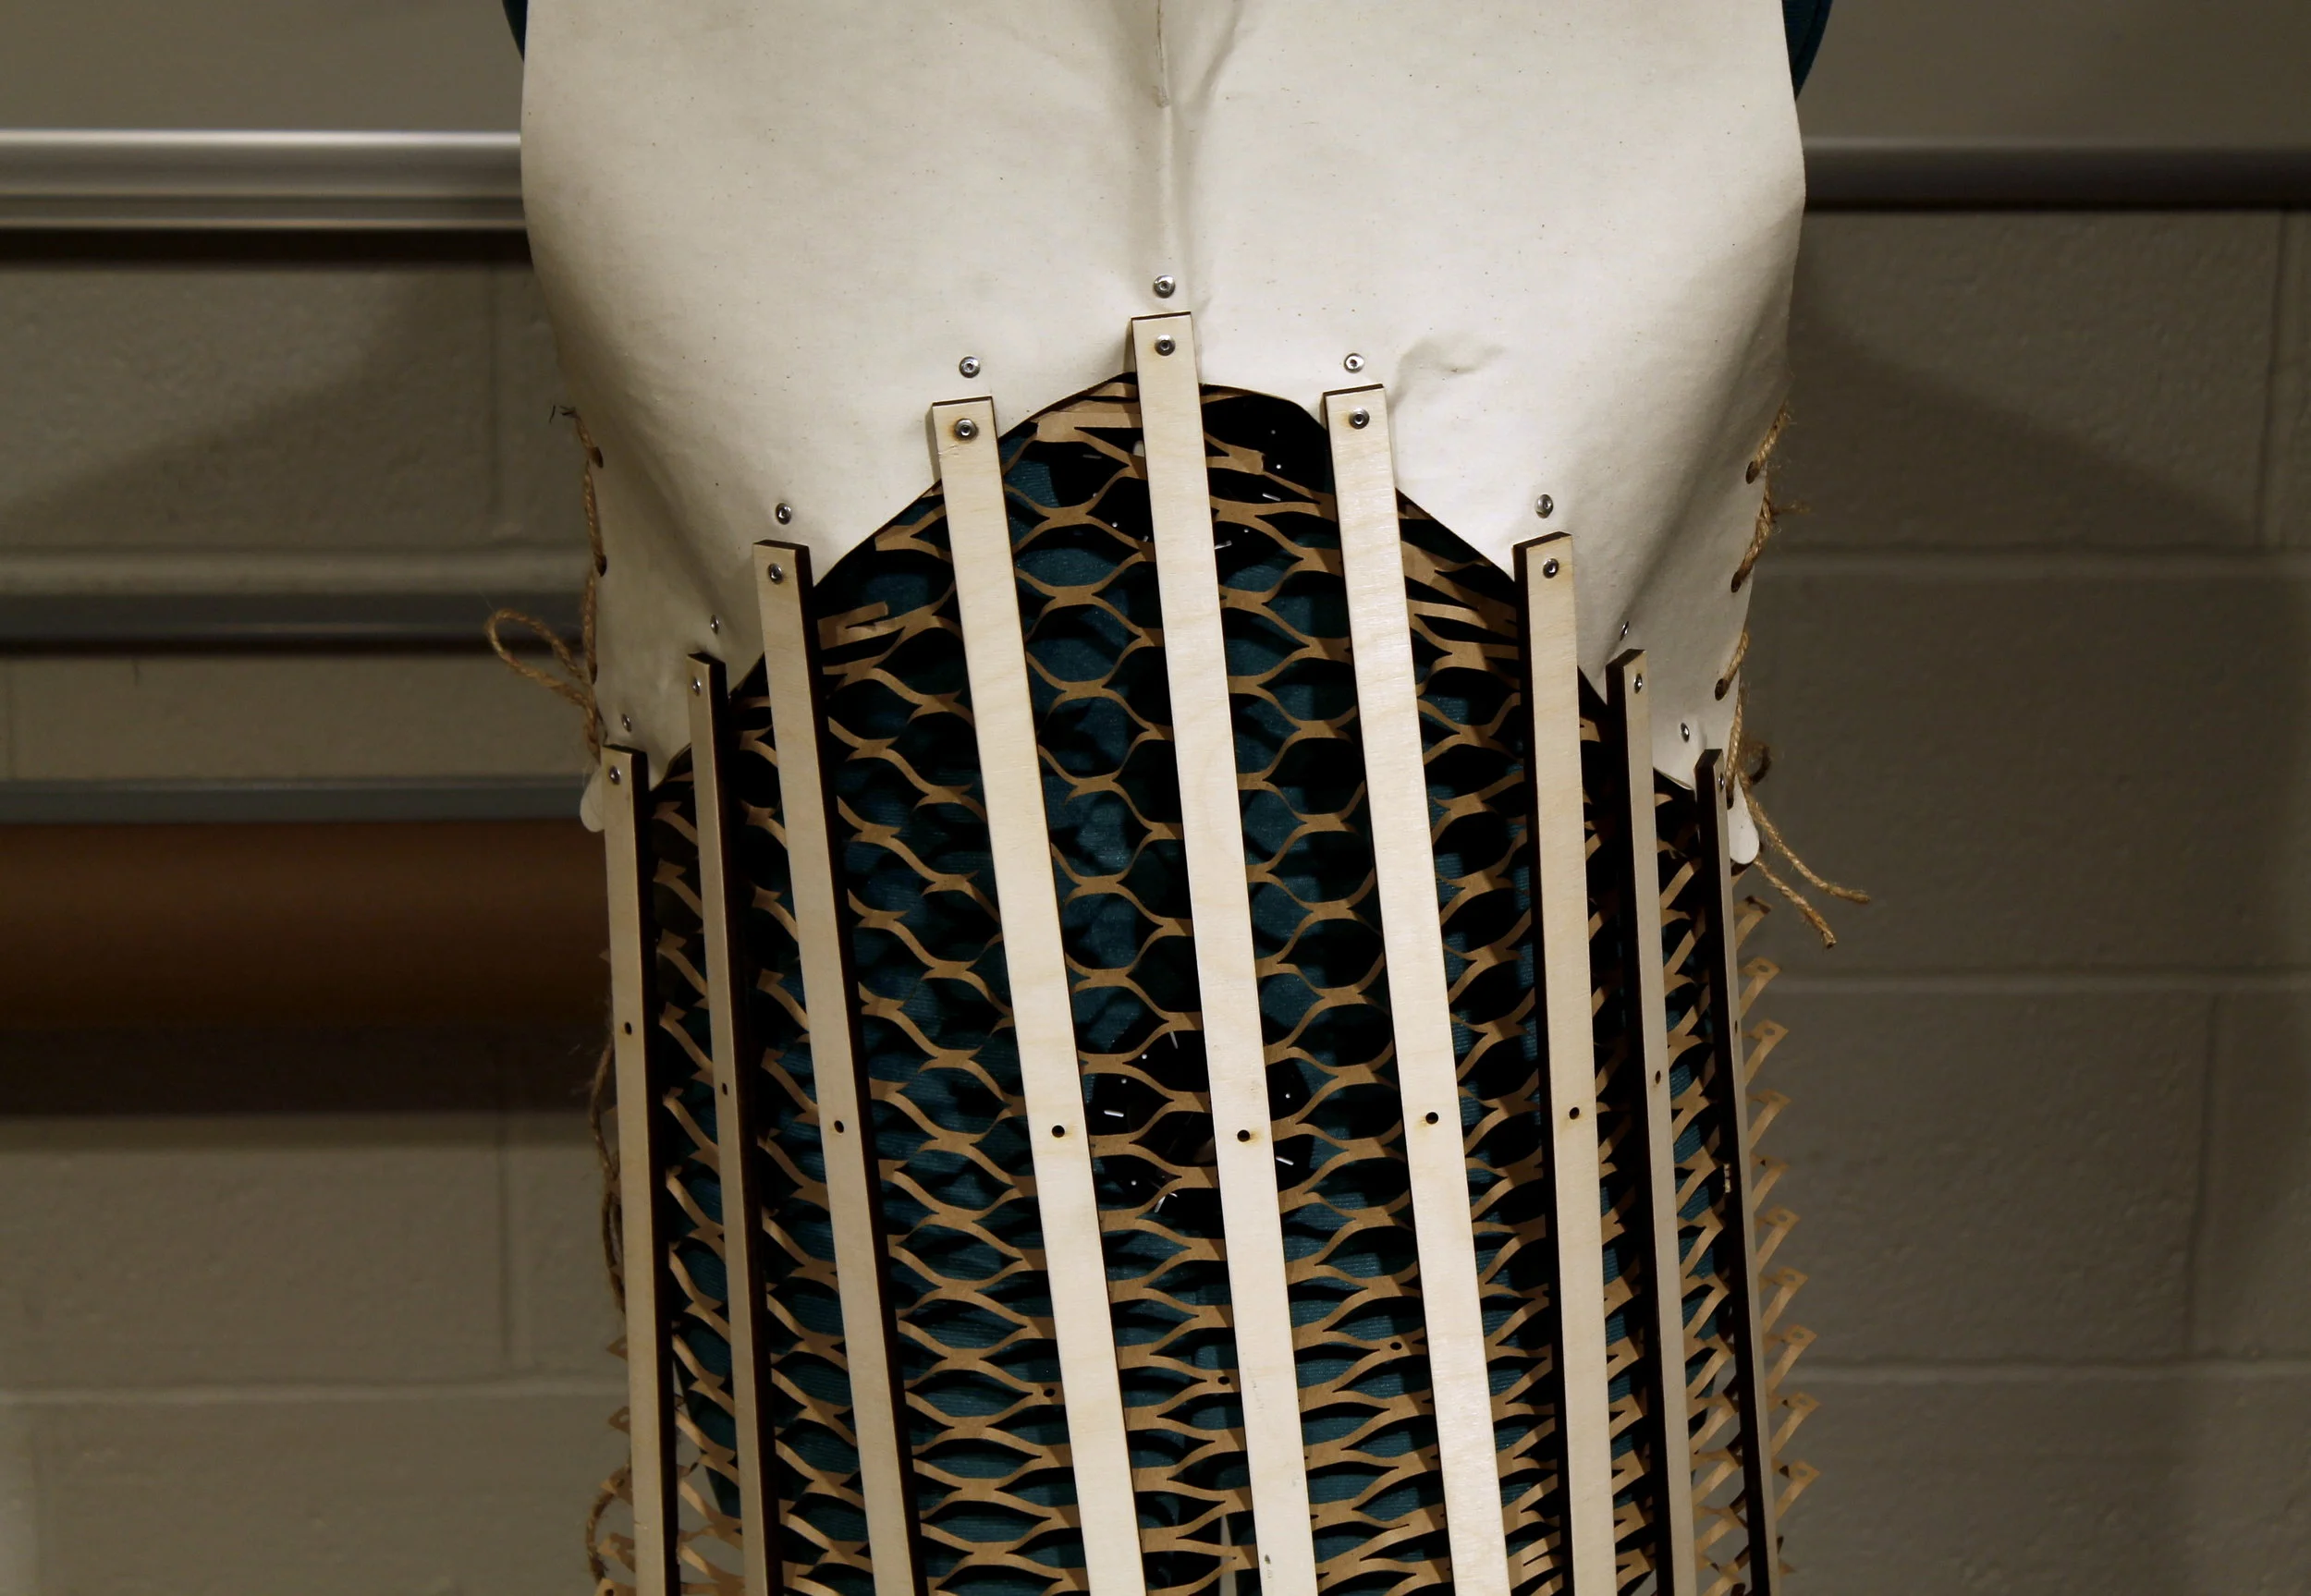
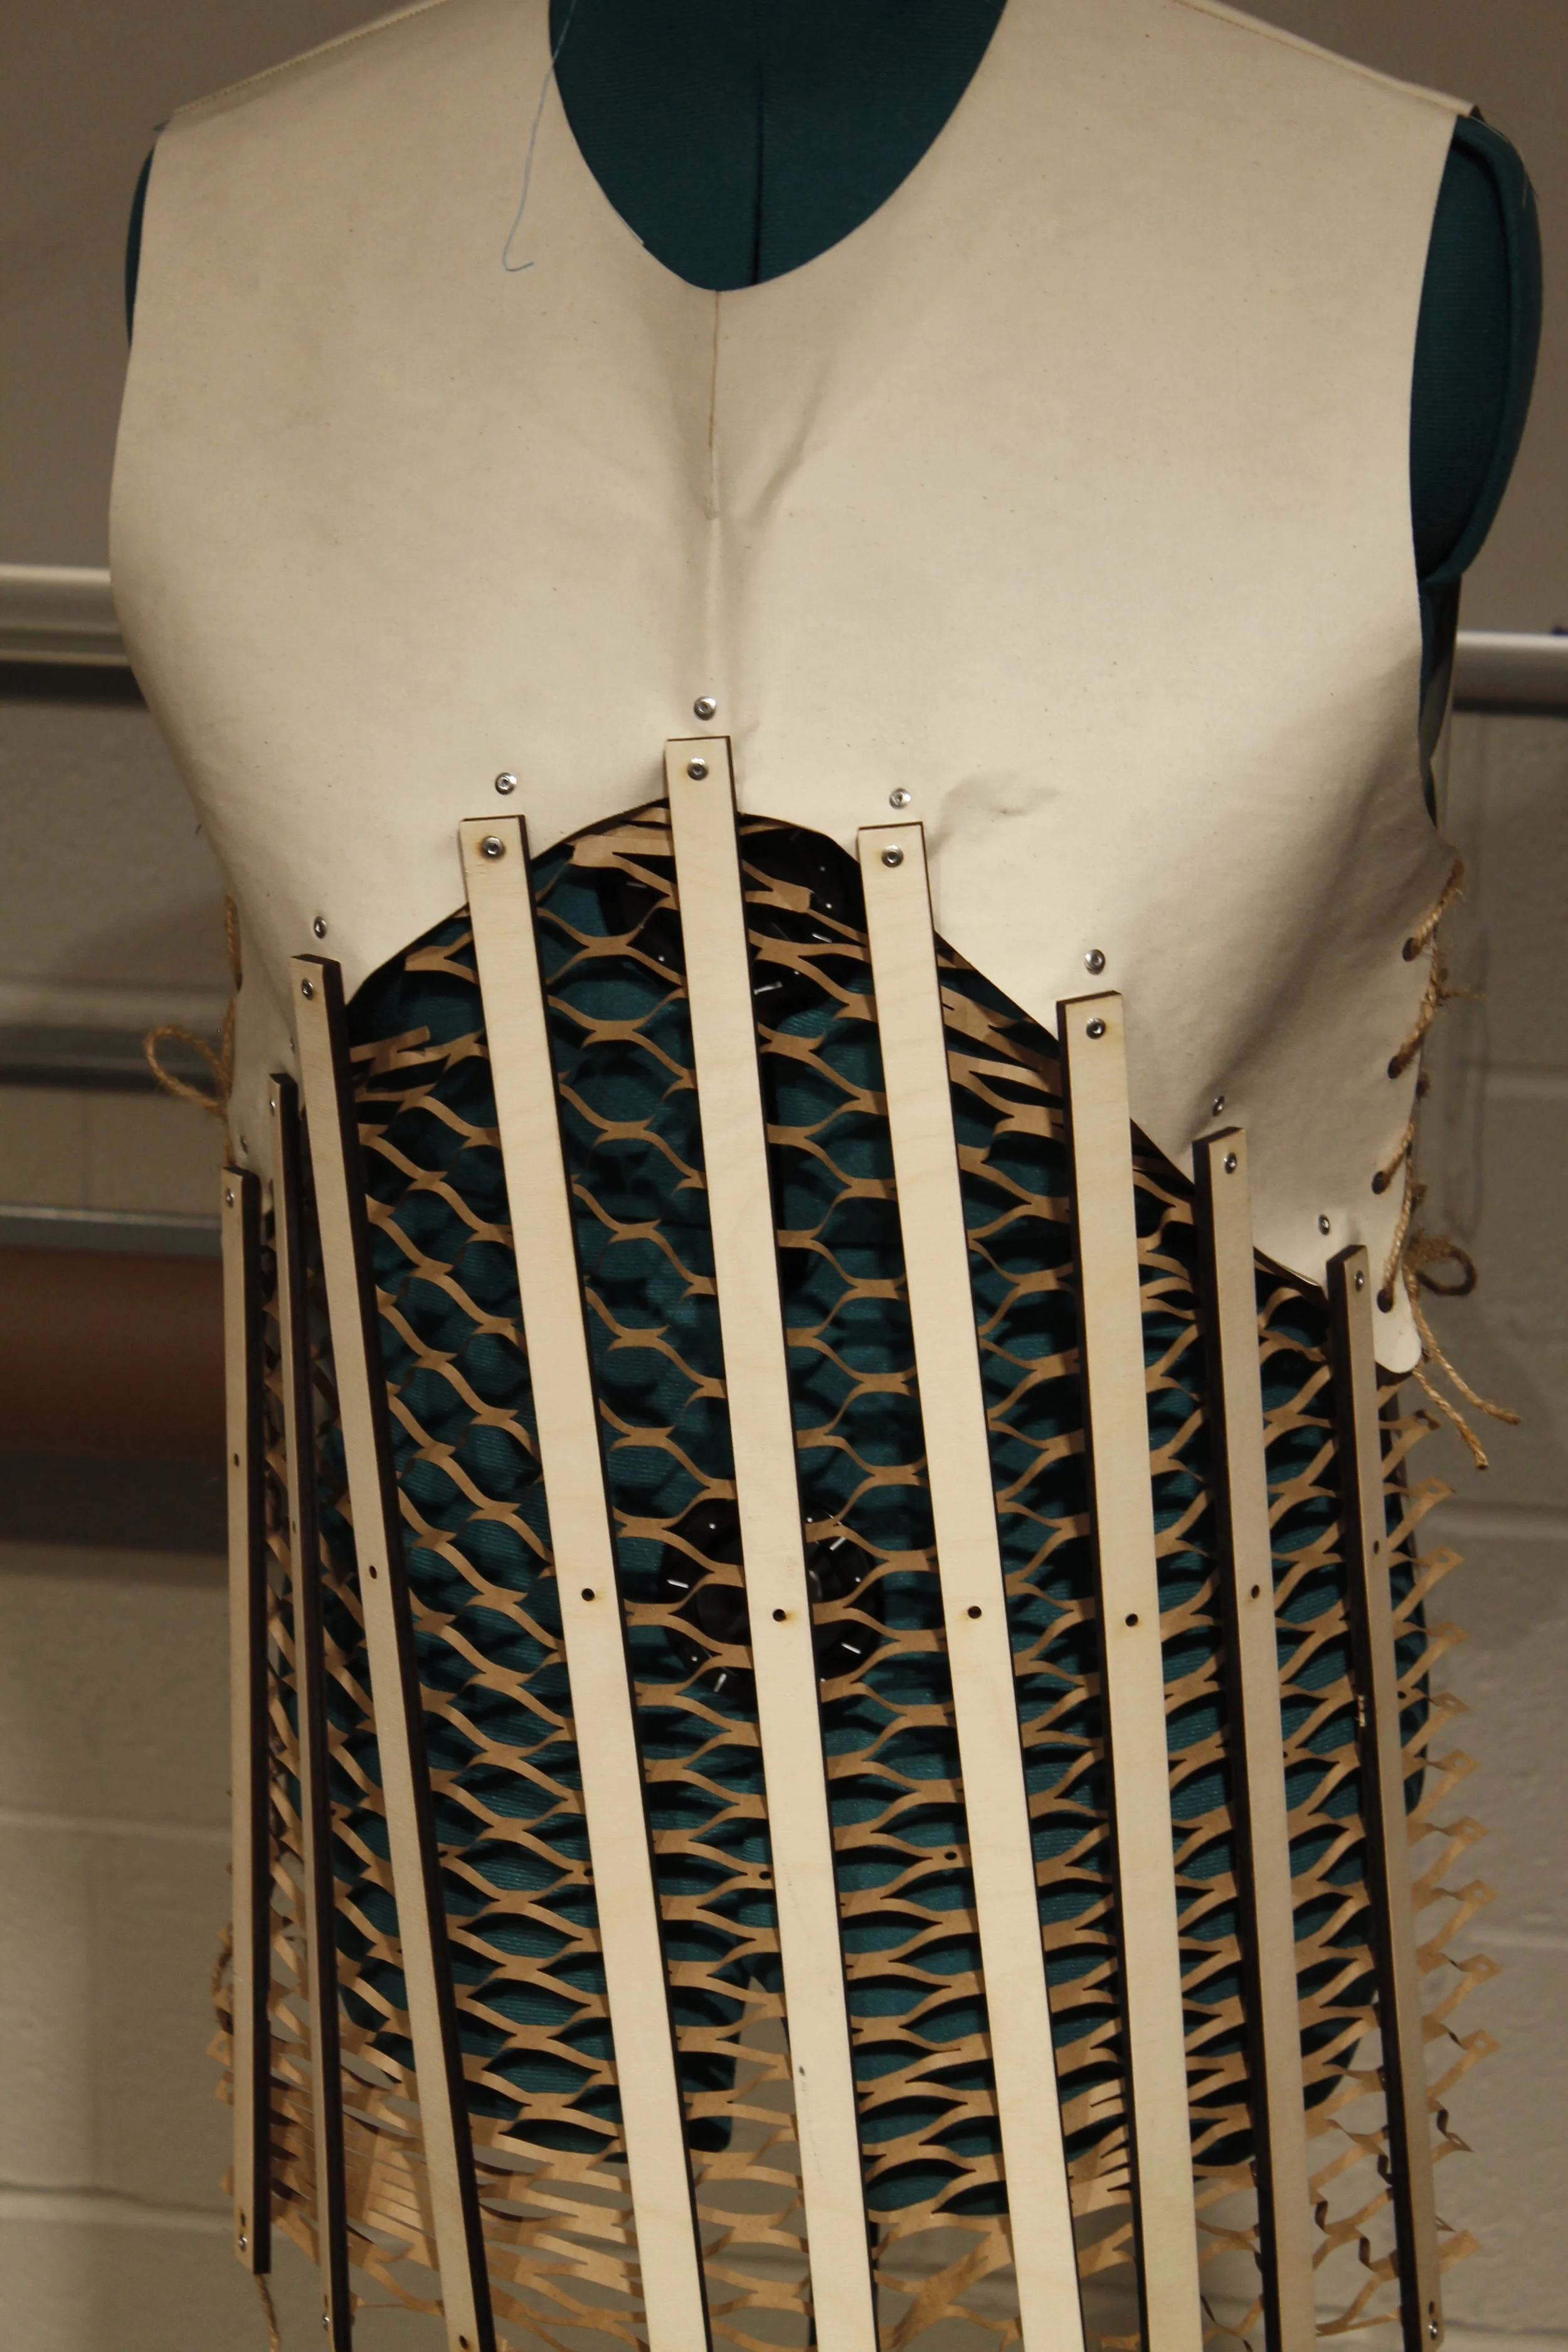
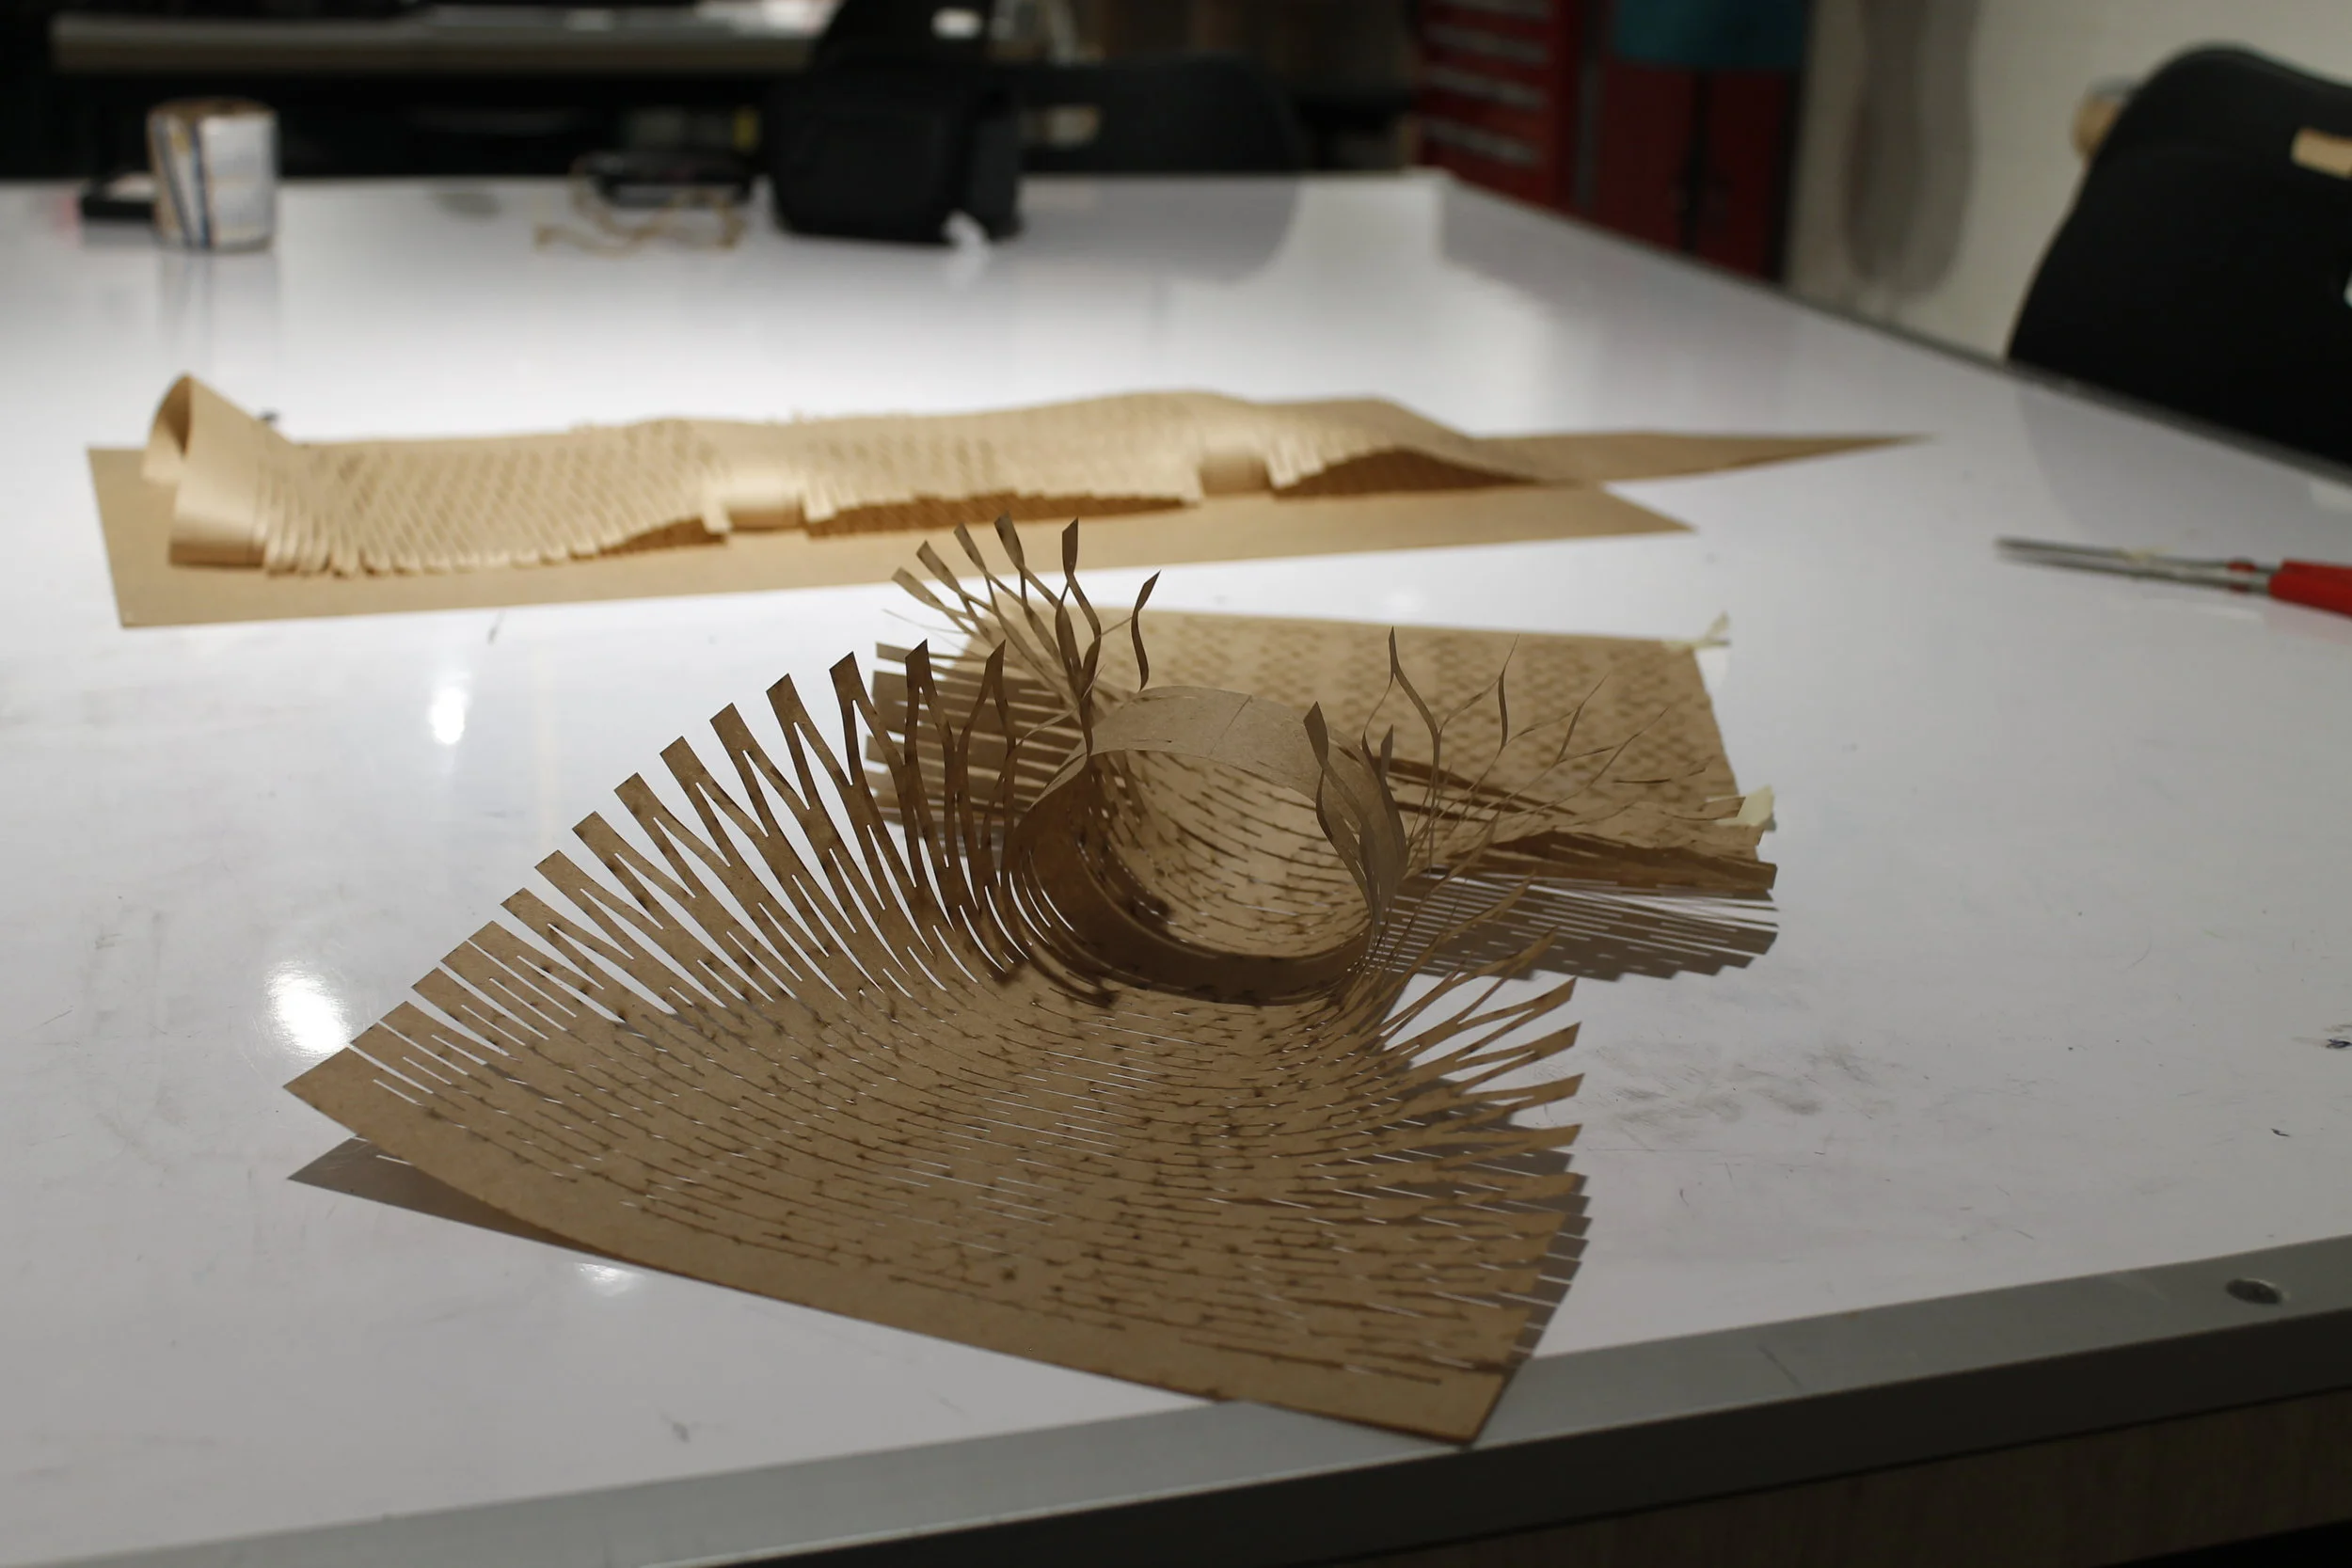
My primary concern was the construction of the collar, because the construction just seemed very complex from the outside. So I started by purchasing a pea coat, taking apart the collar and reconstructing it in another fabric. After building some intuition for lapel and collar construction I moved on to the larger garment. I got a digital pattern from Burda, laser cut a few small mockups to get a sense of how everything came together. Finally it was time to make some modifications.

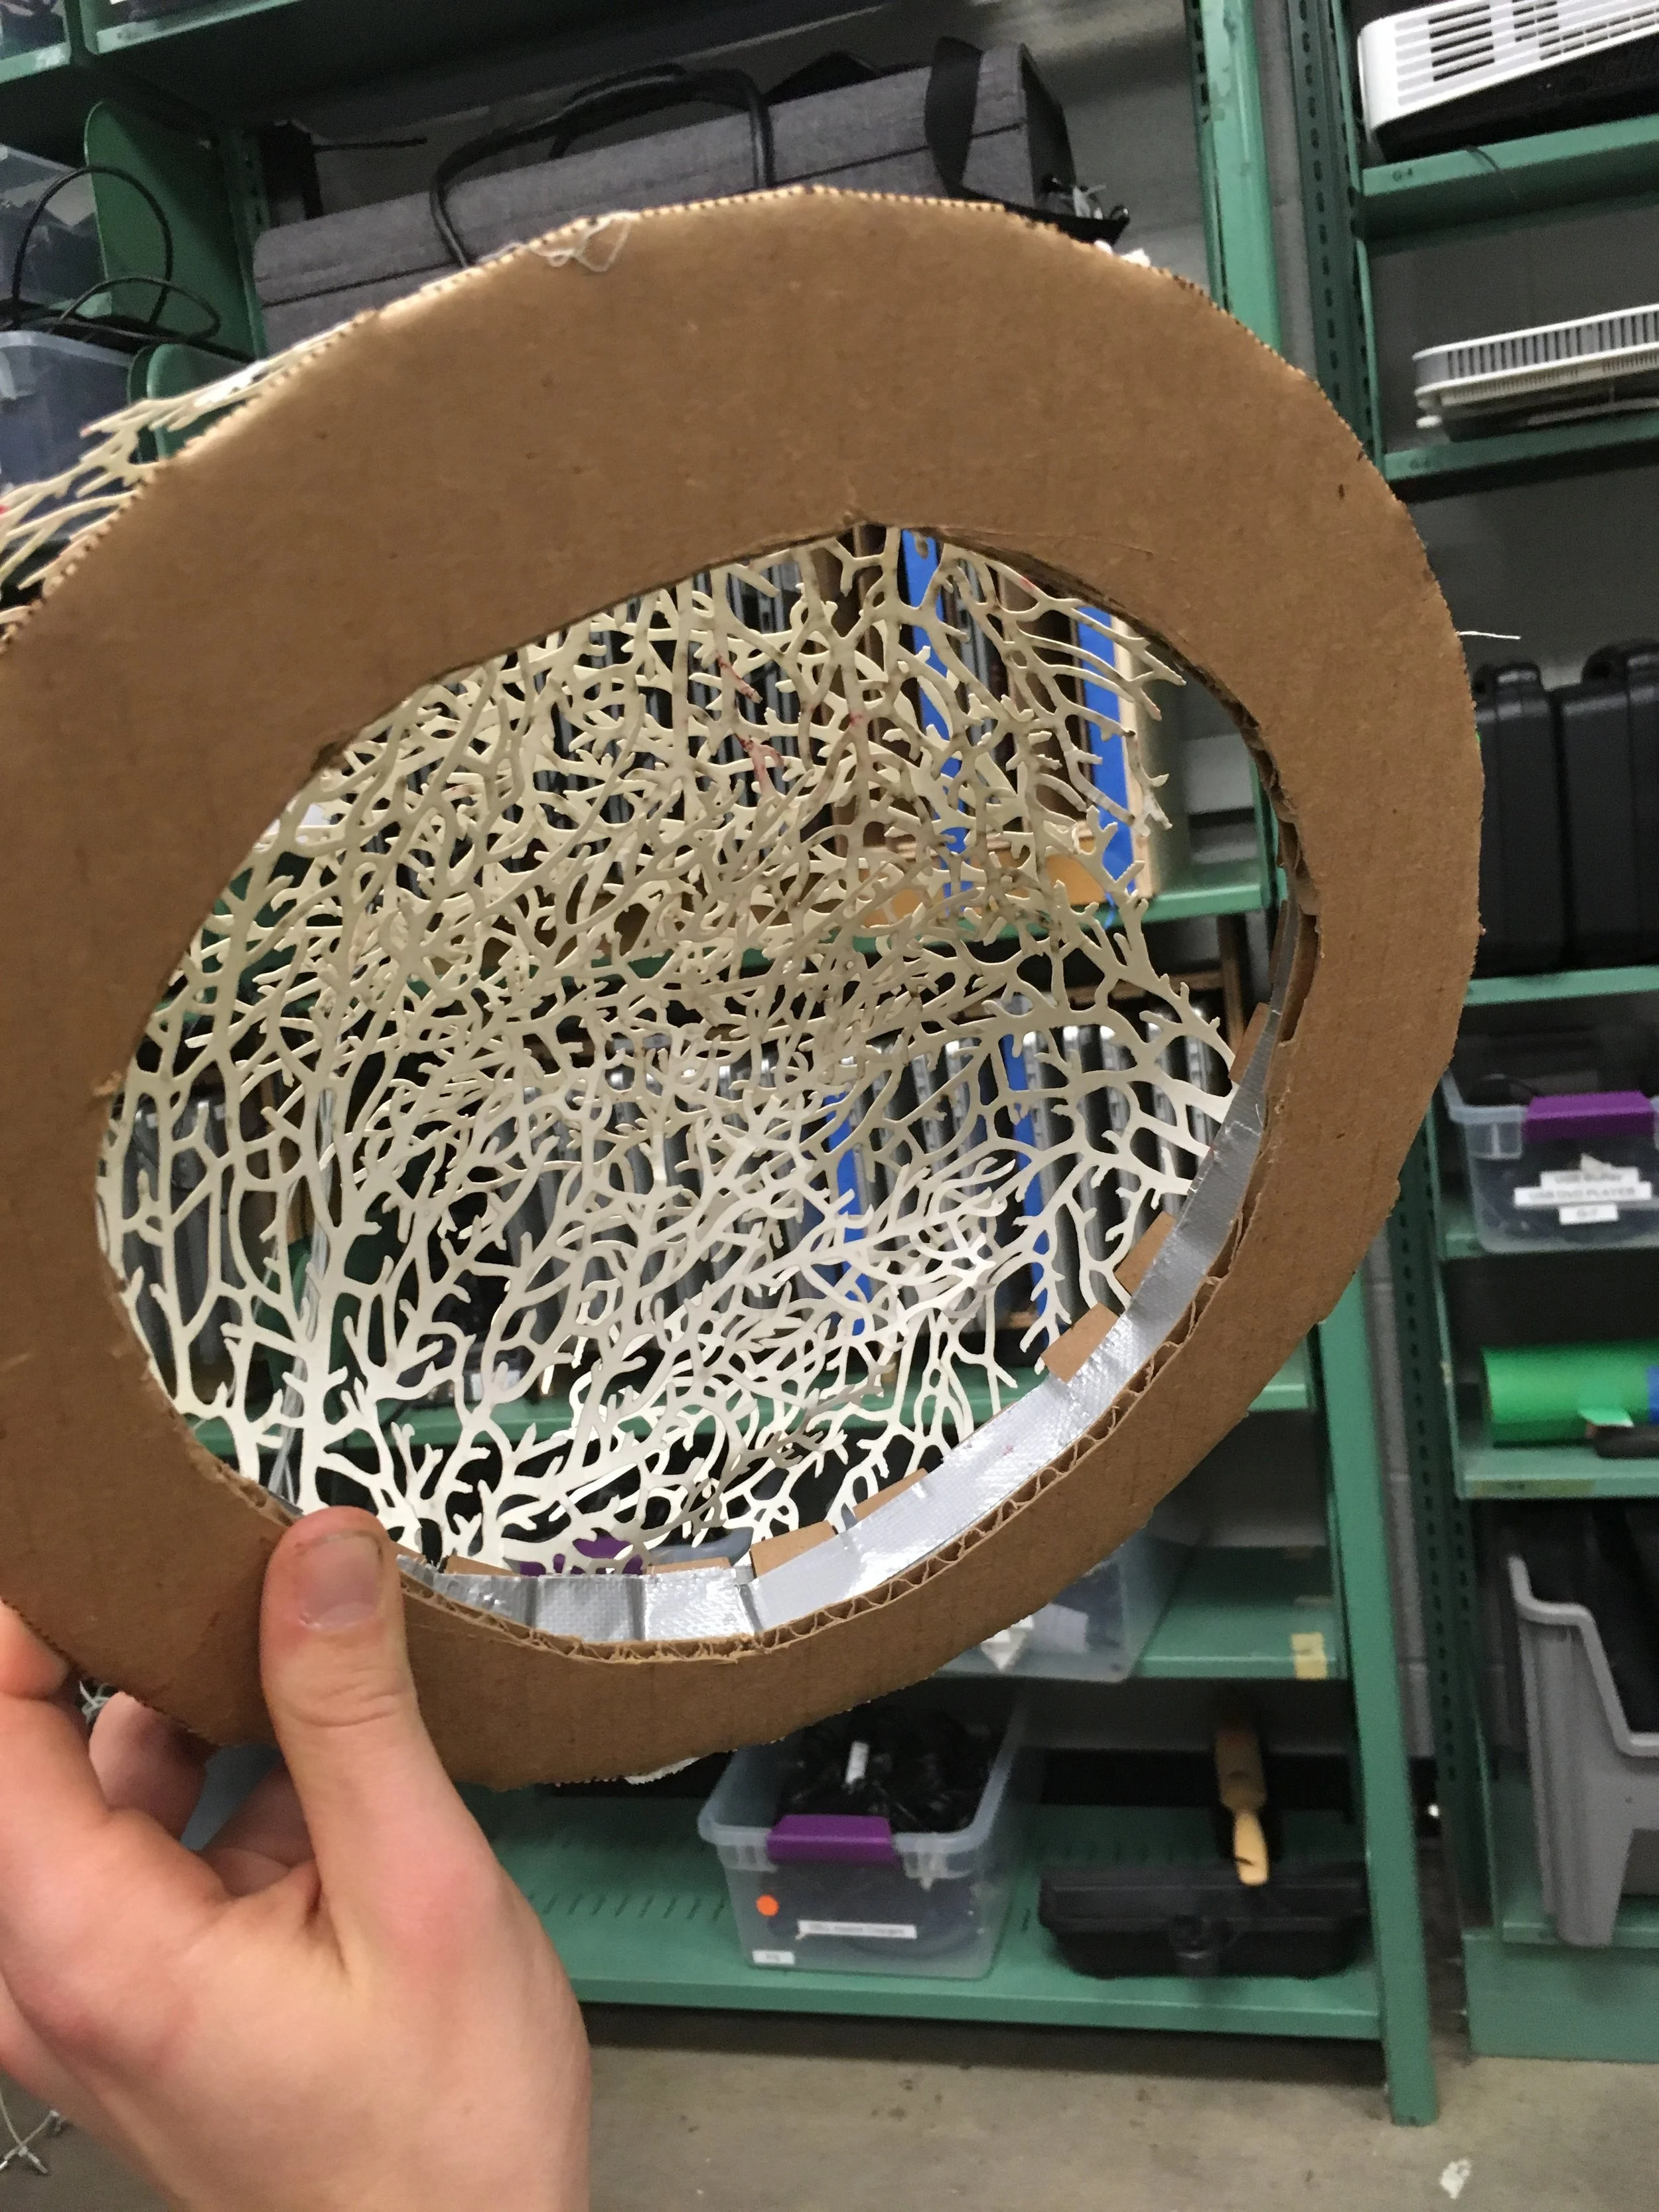
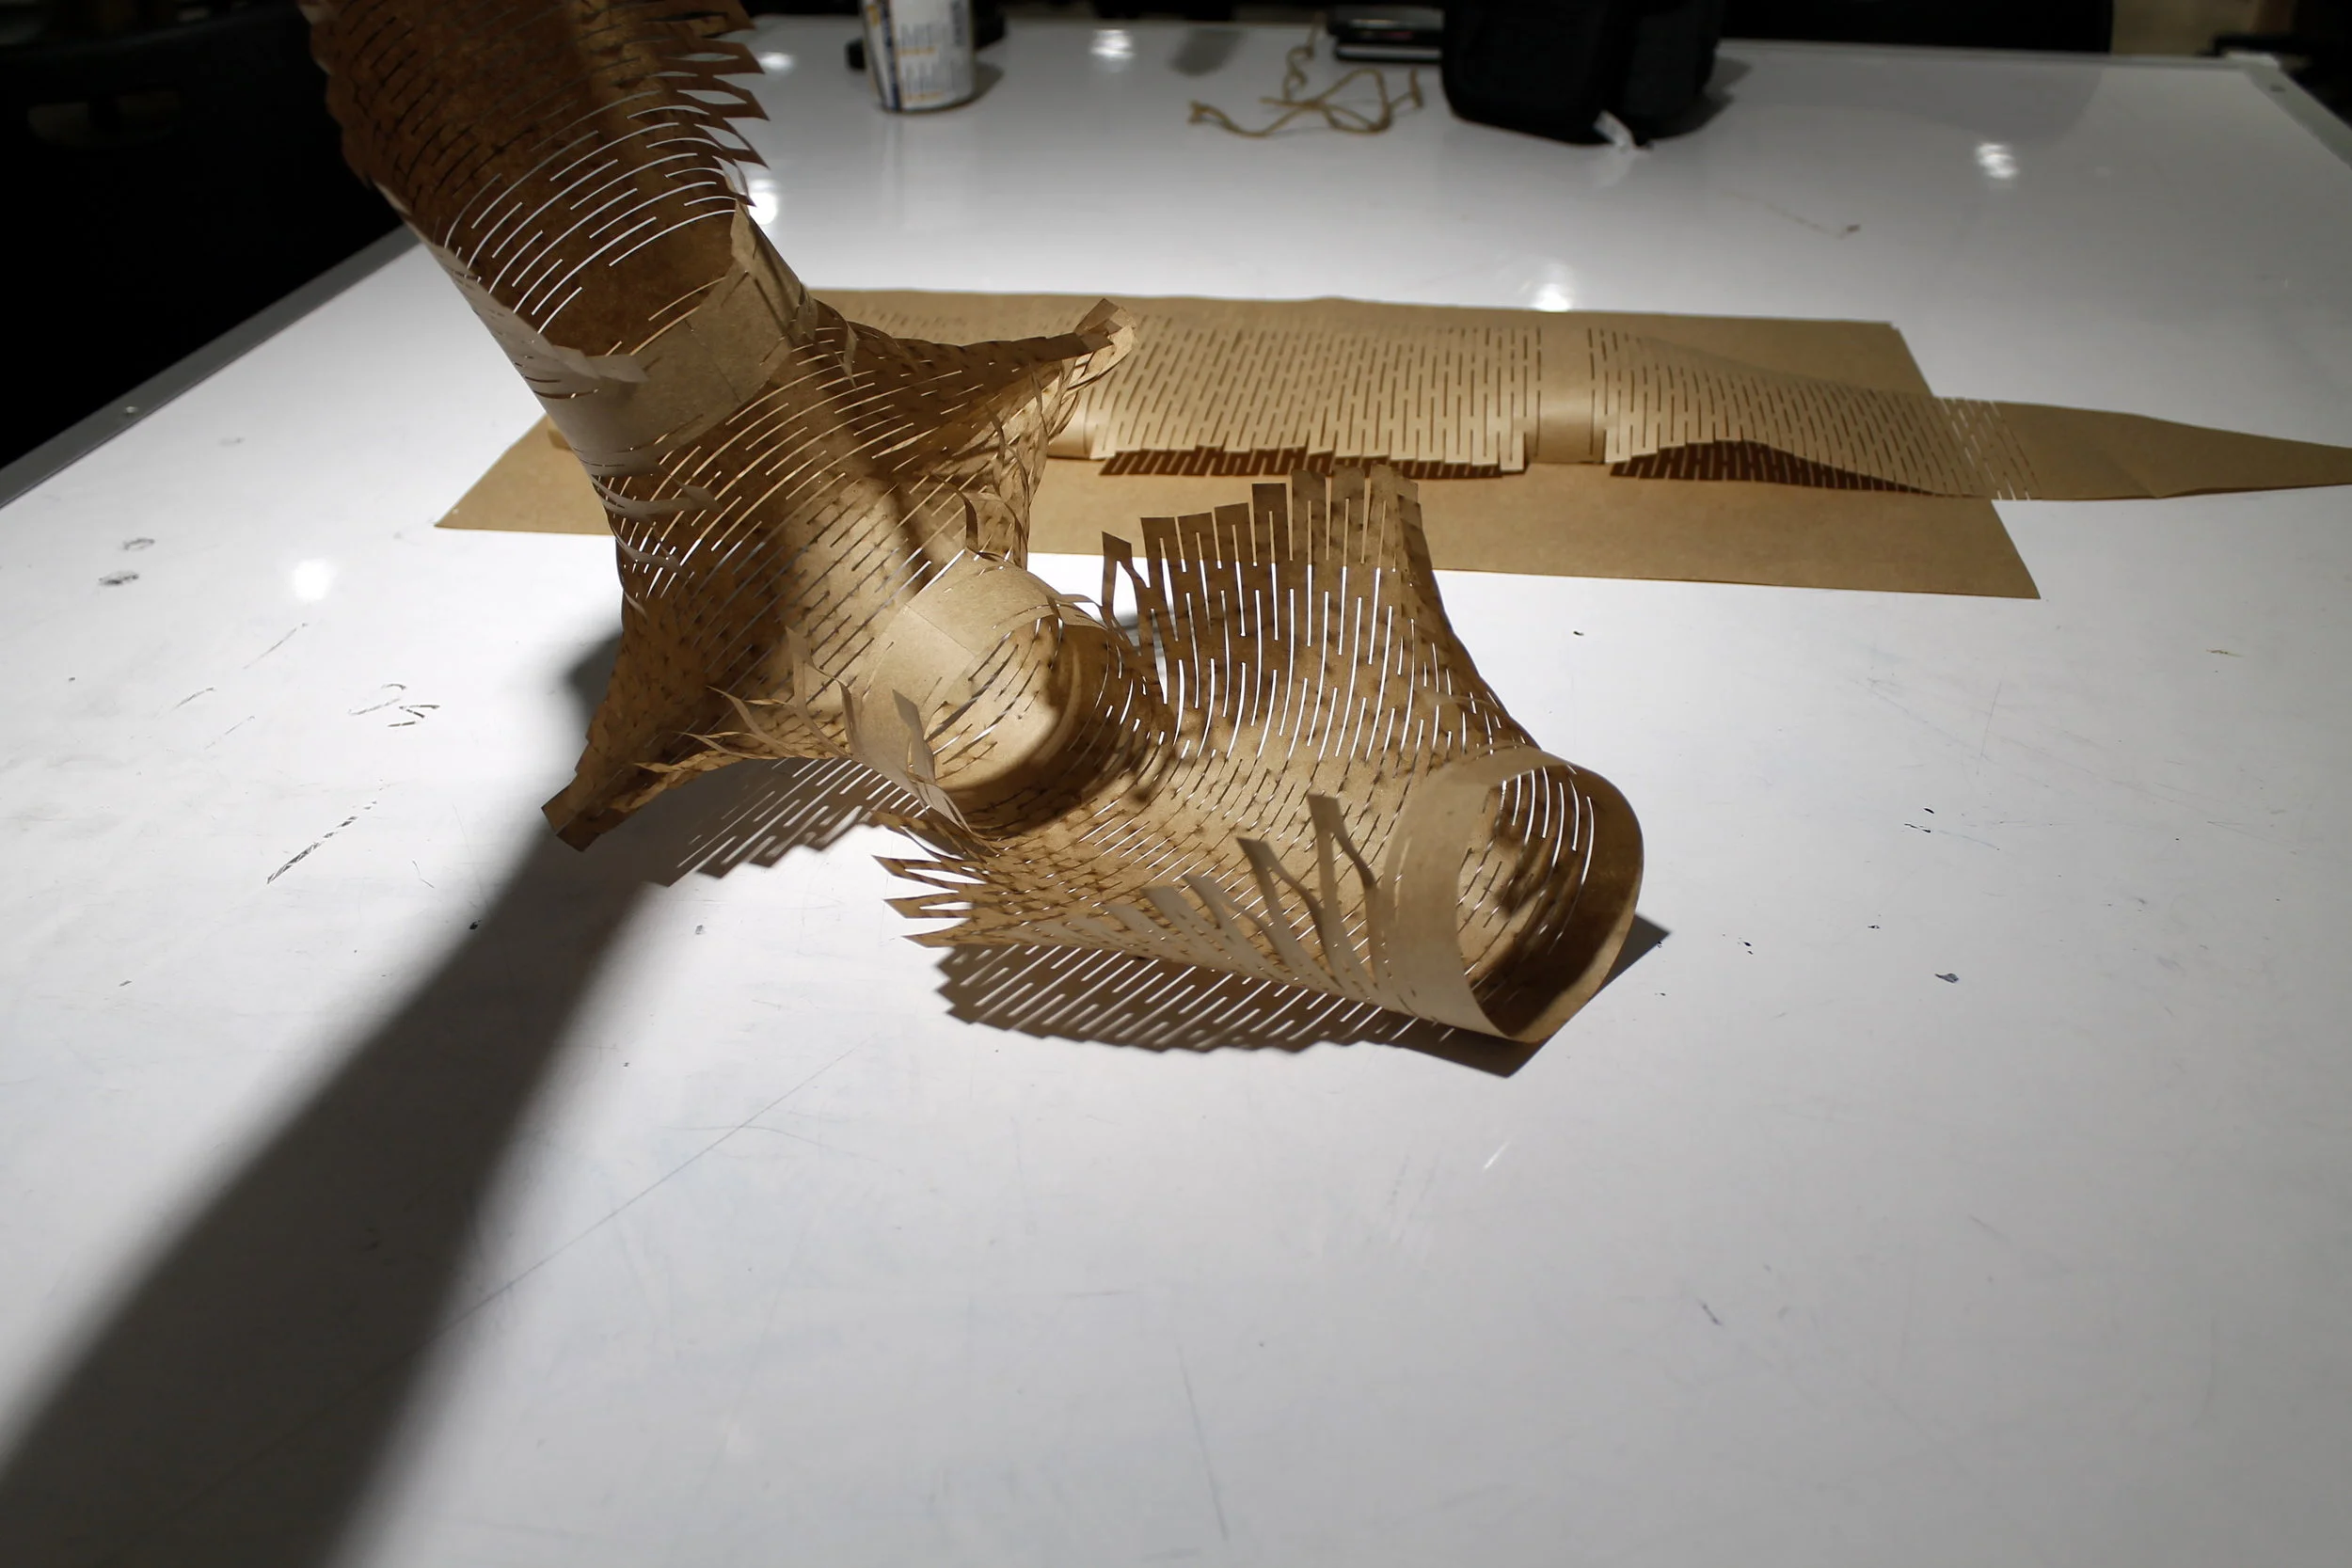
The goal behind the outfit I’m constructing is to combine the quality of line and form of a manta ray with that of a classic naval uniform. To bring the quality of the manta ray into the pea coat I tried to add forms that suggested or made reference to the horns and gills of the manta ray.

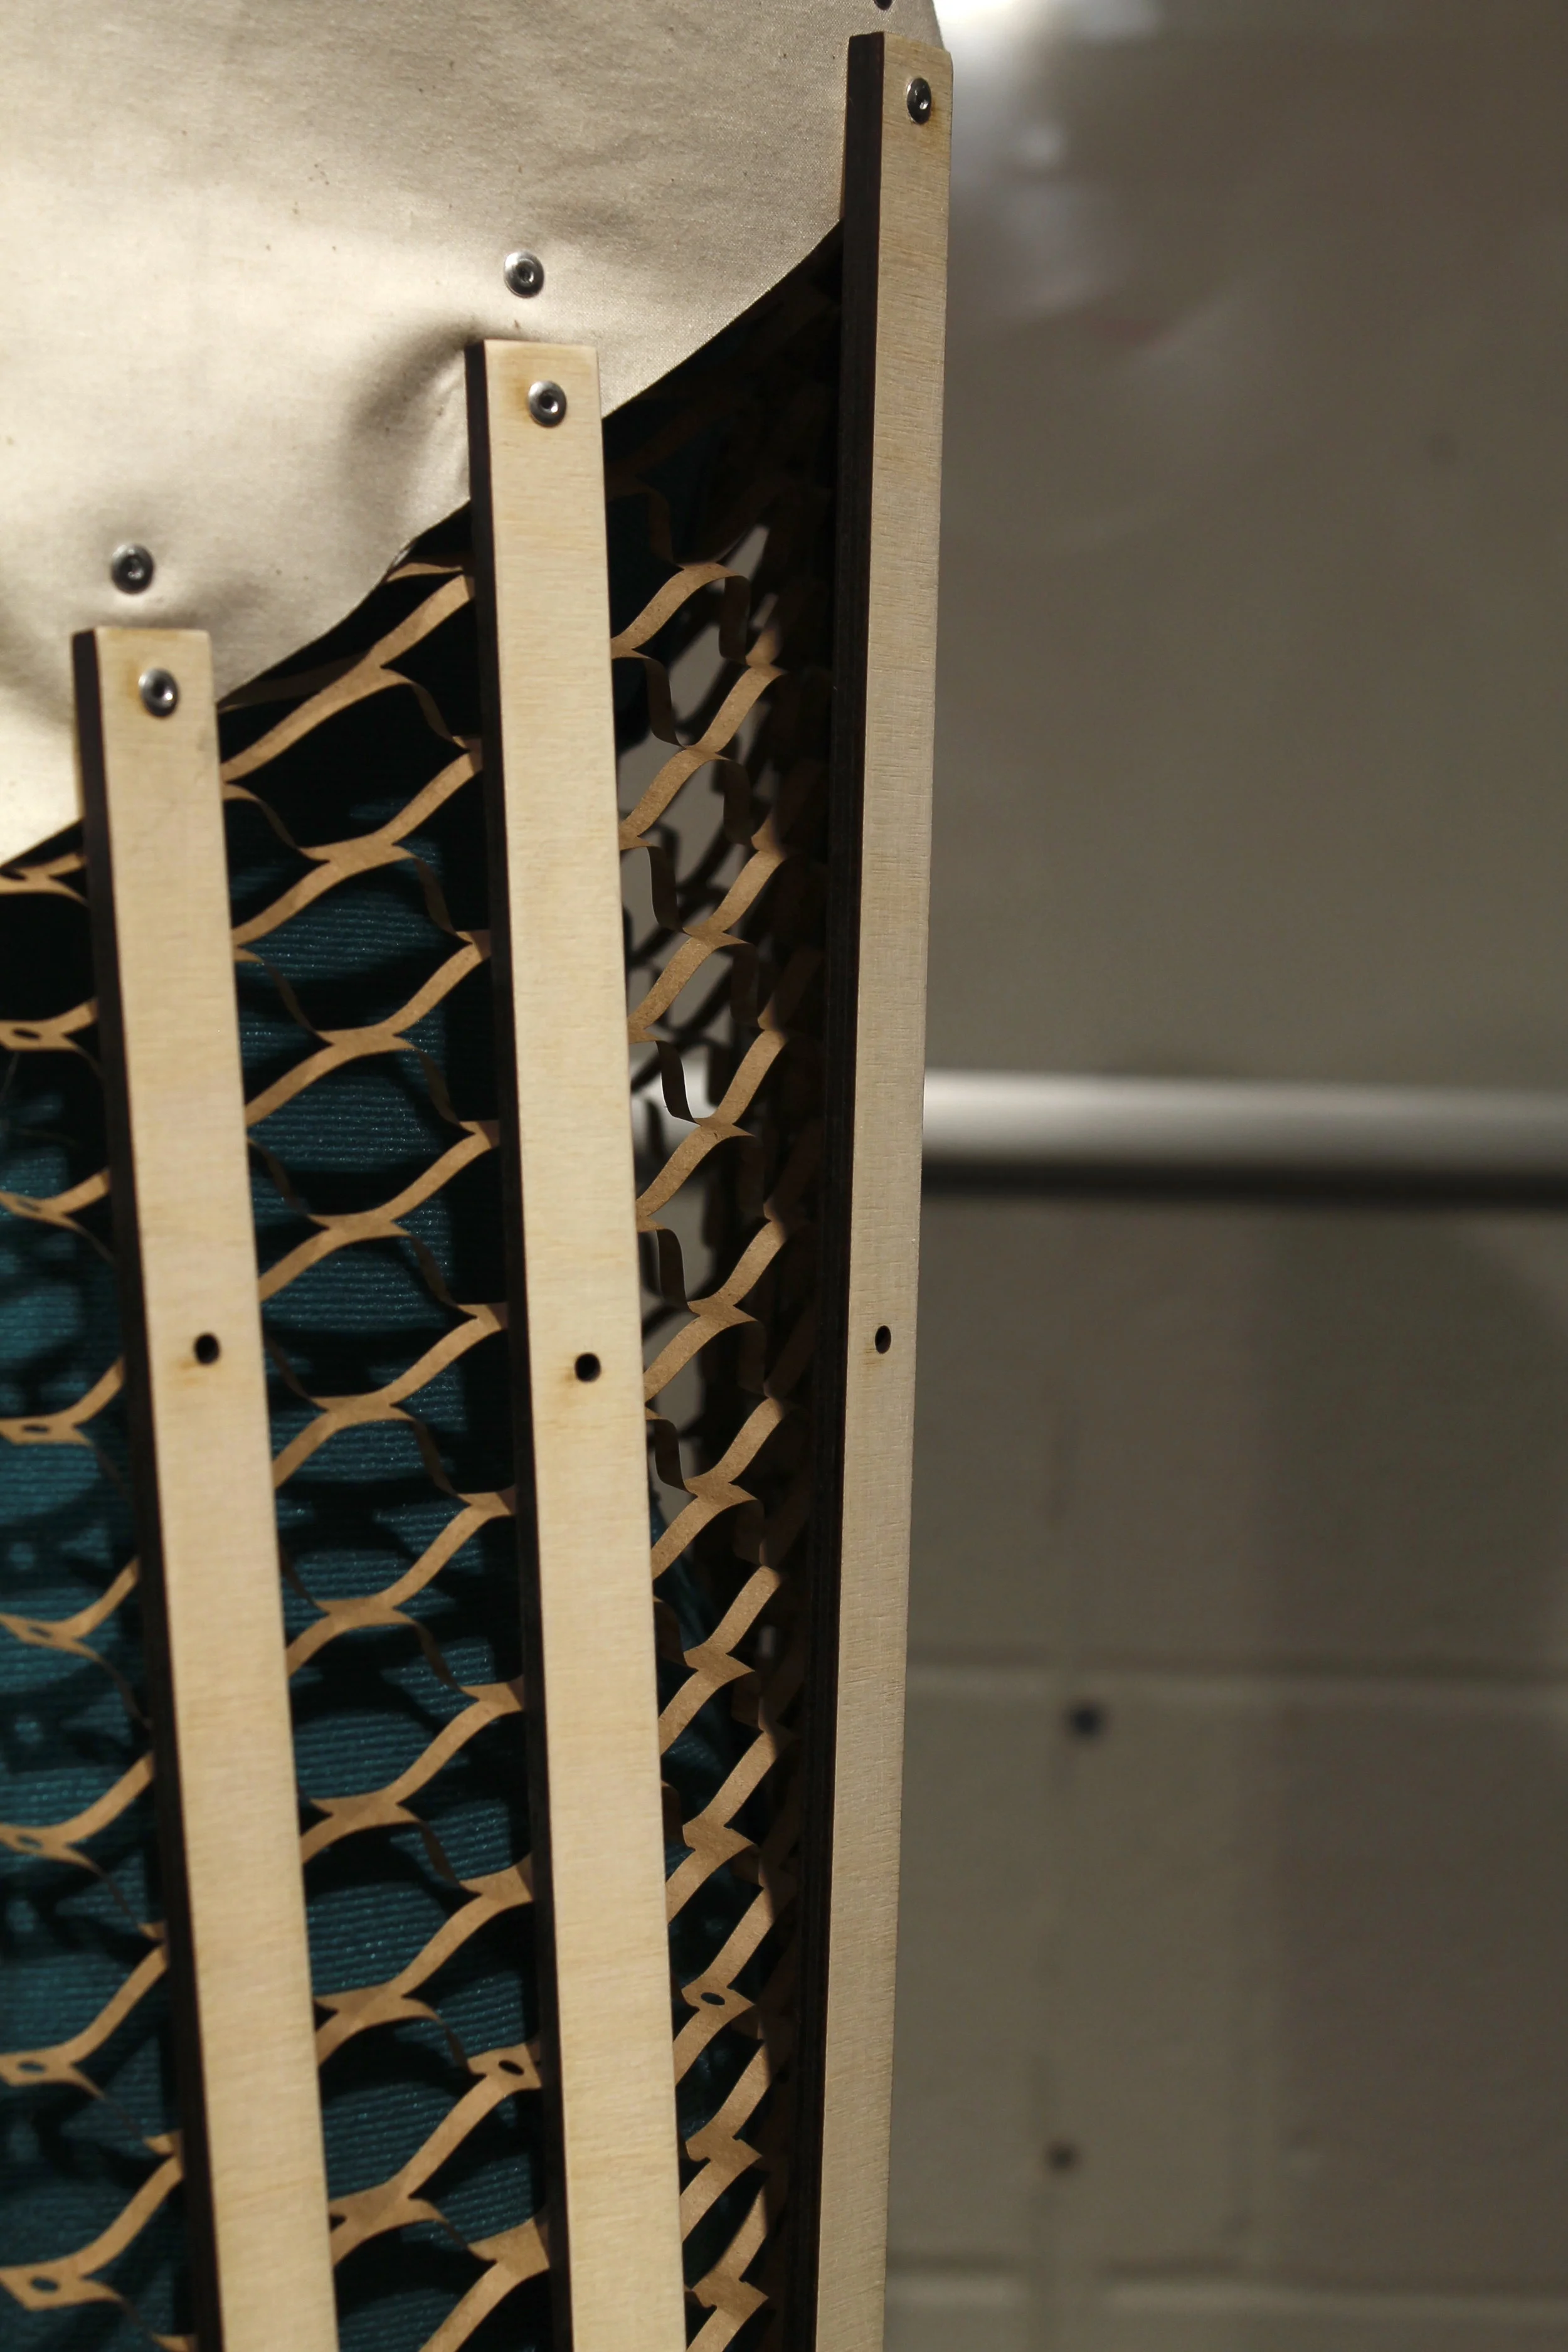
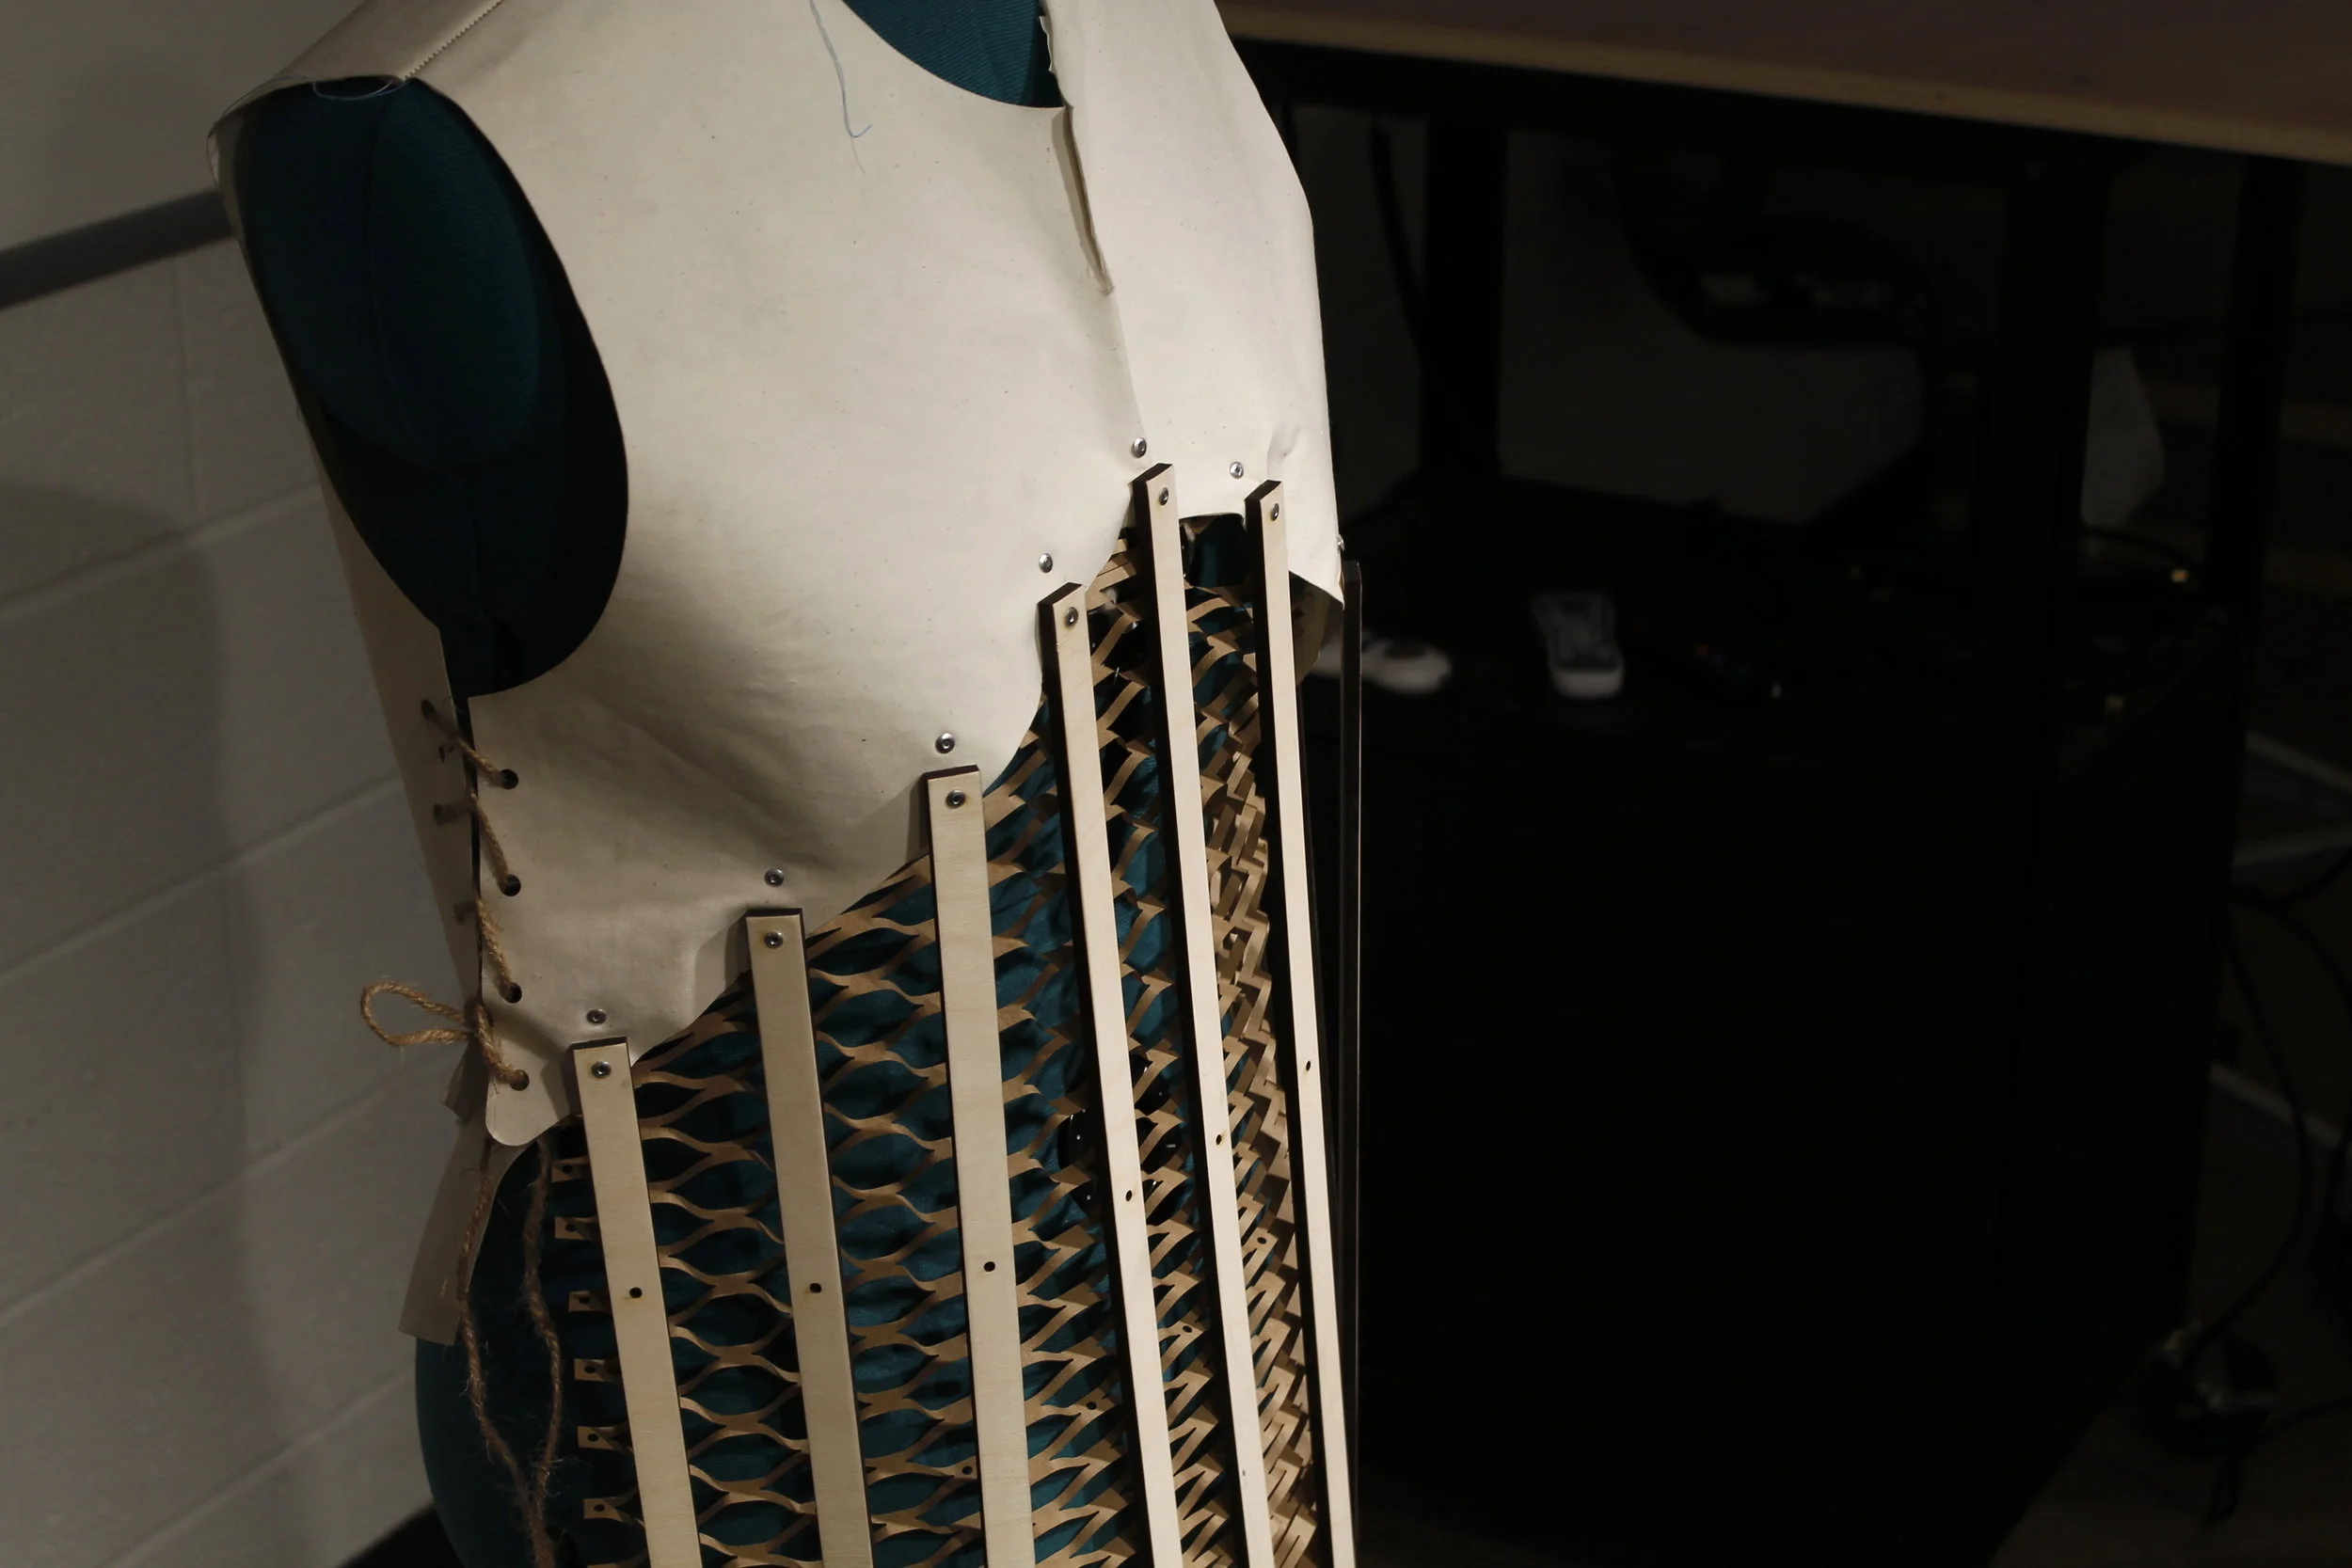
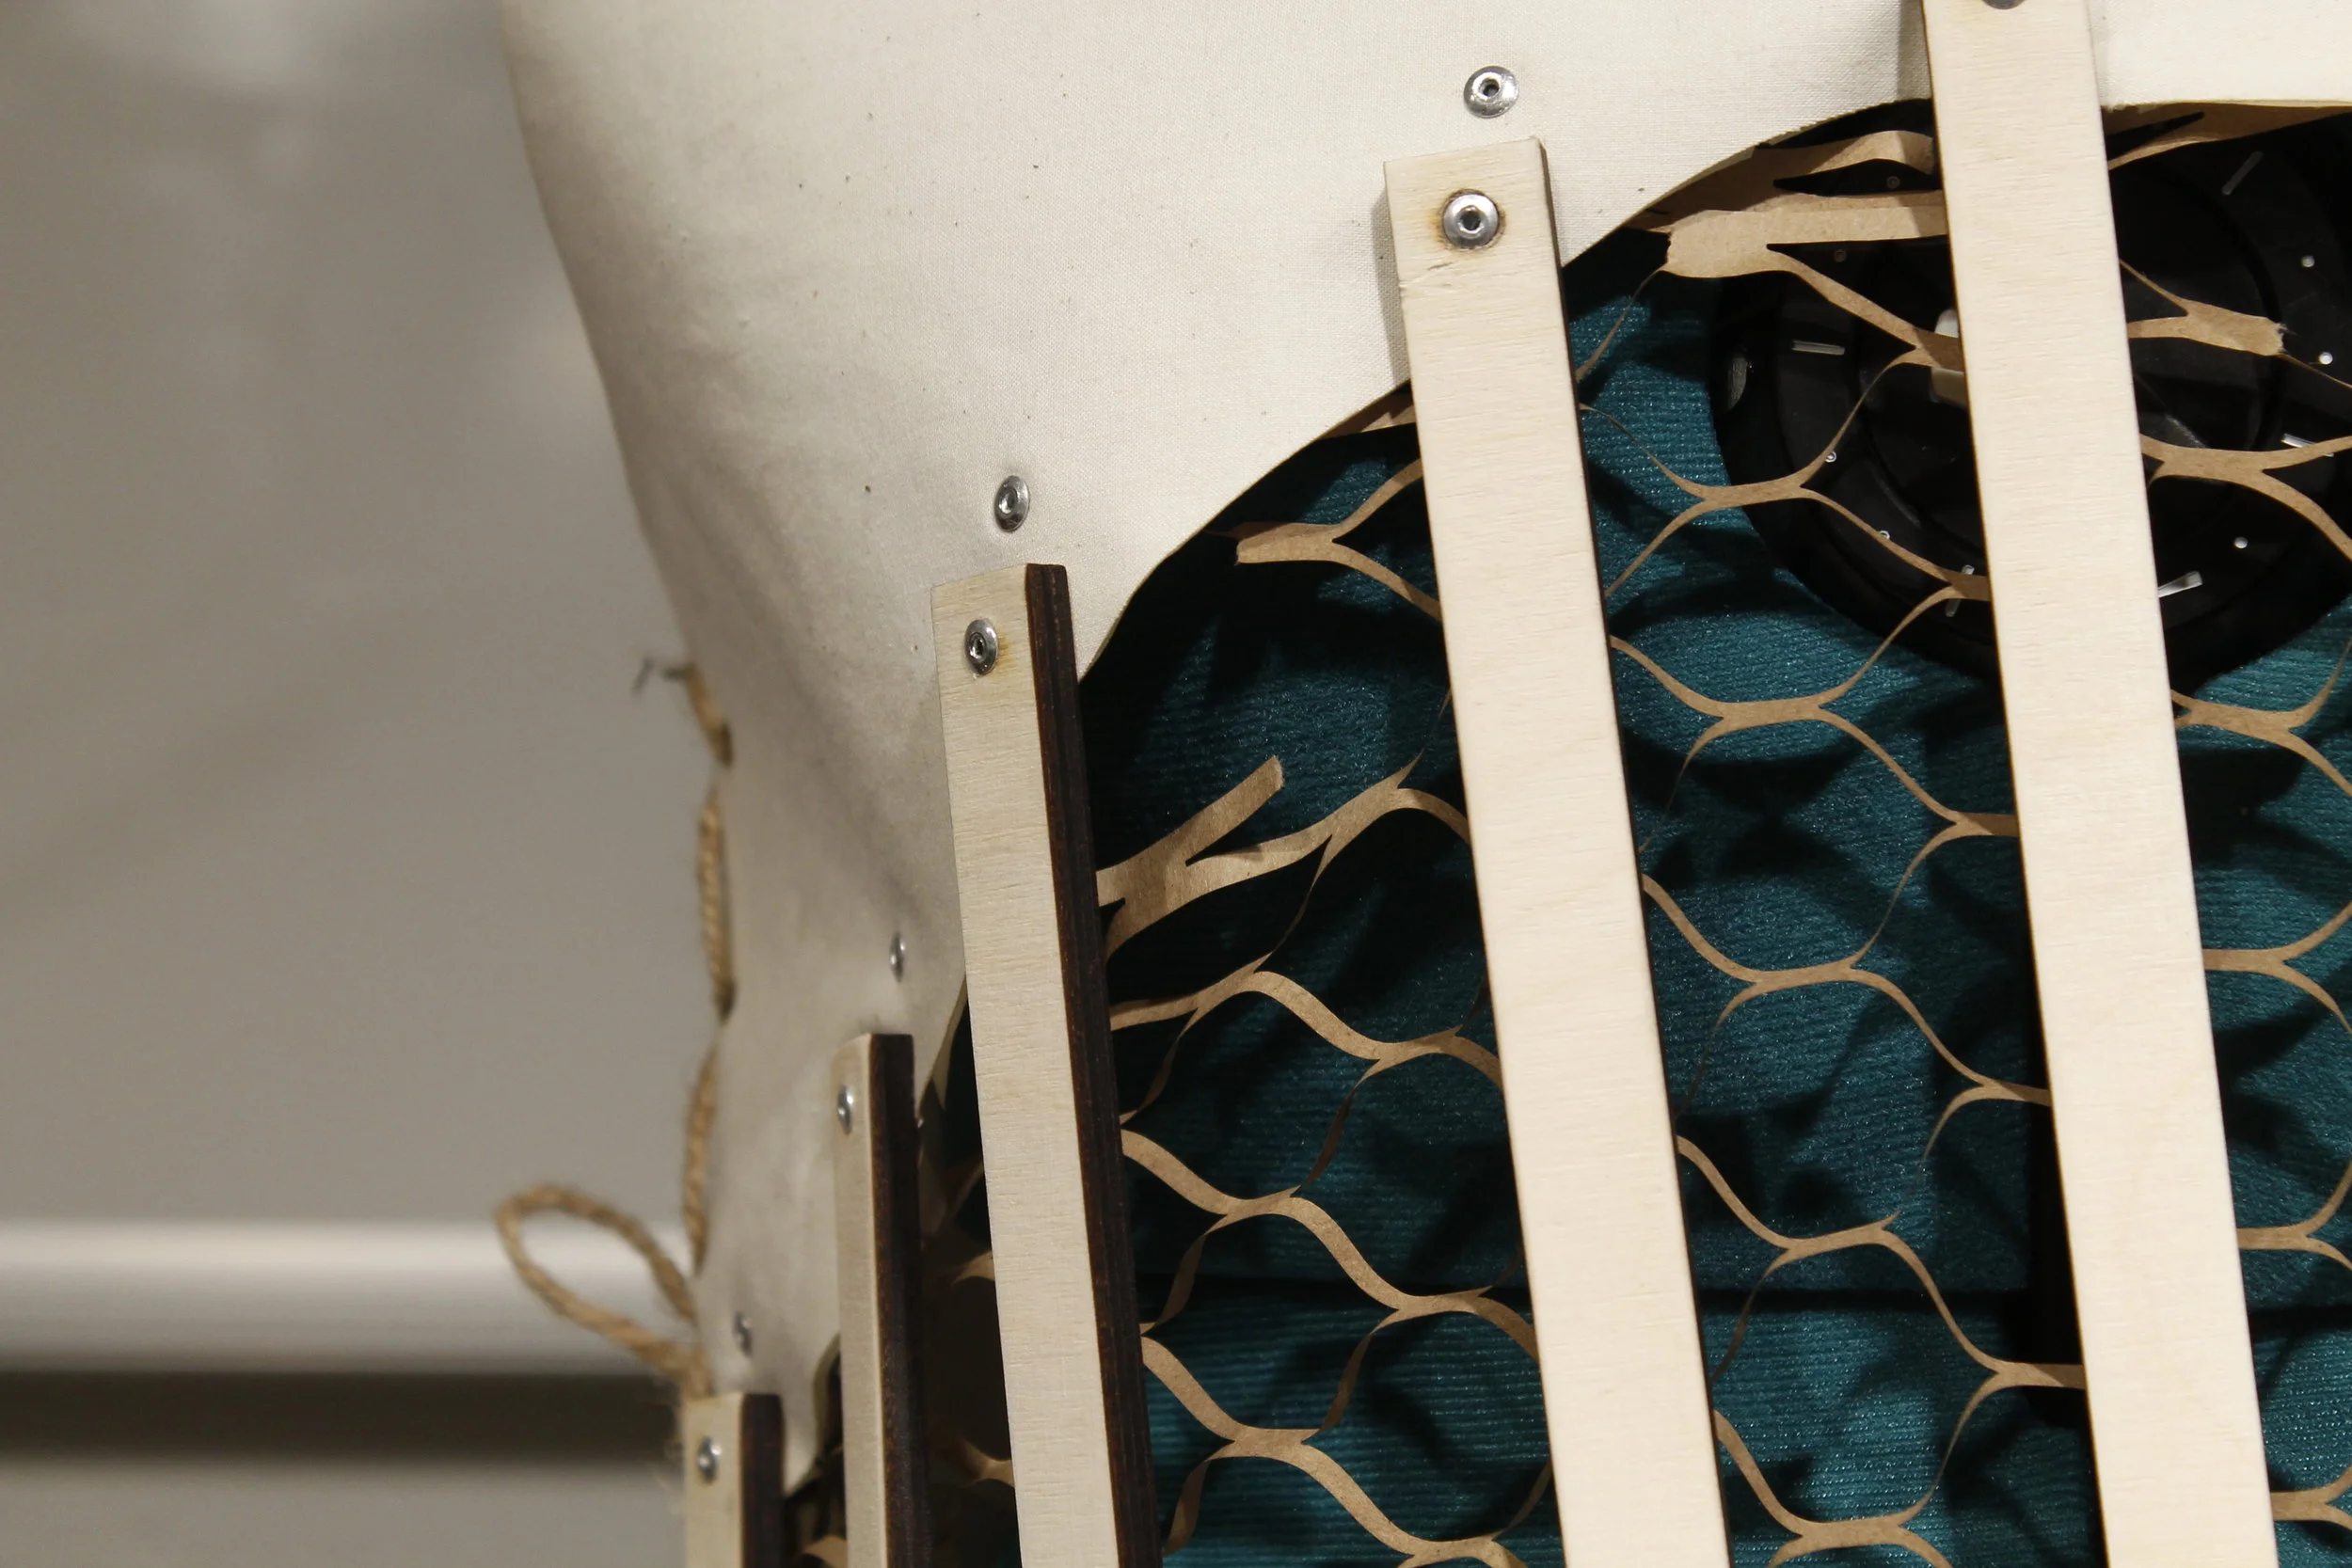
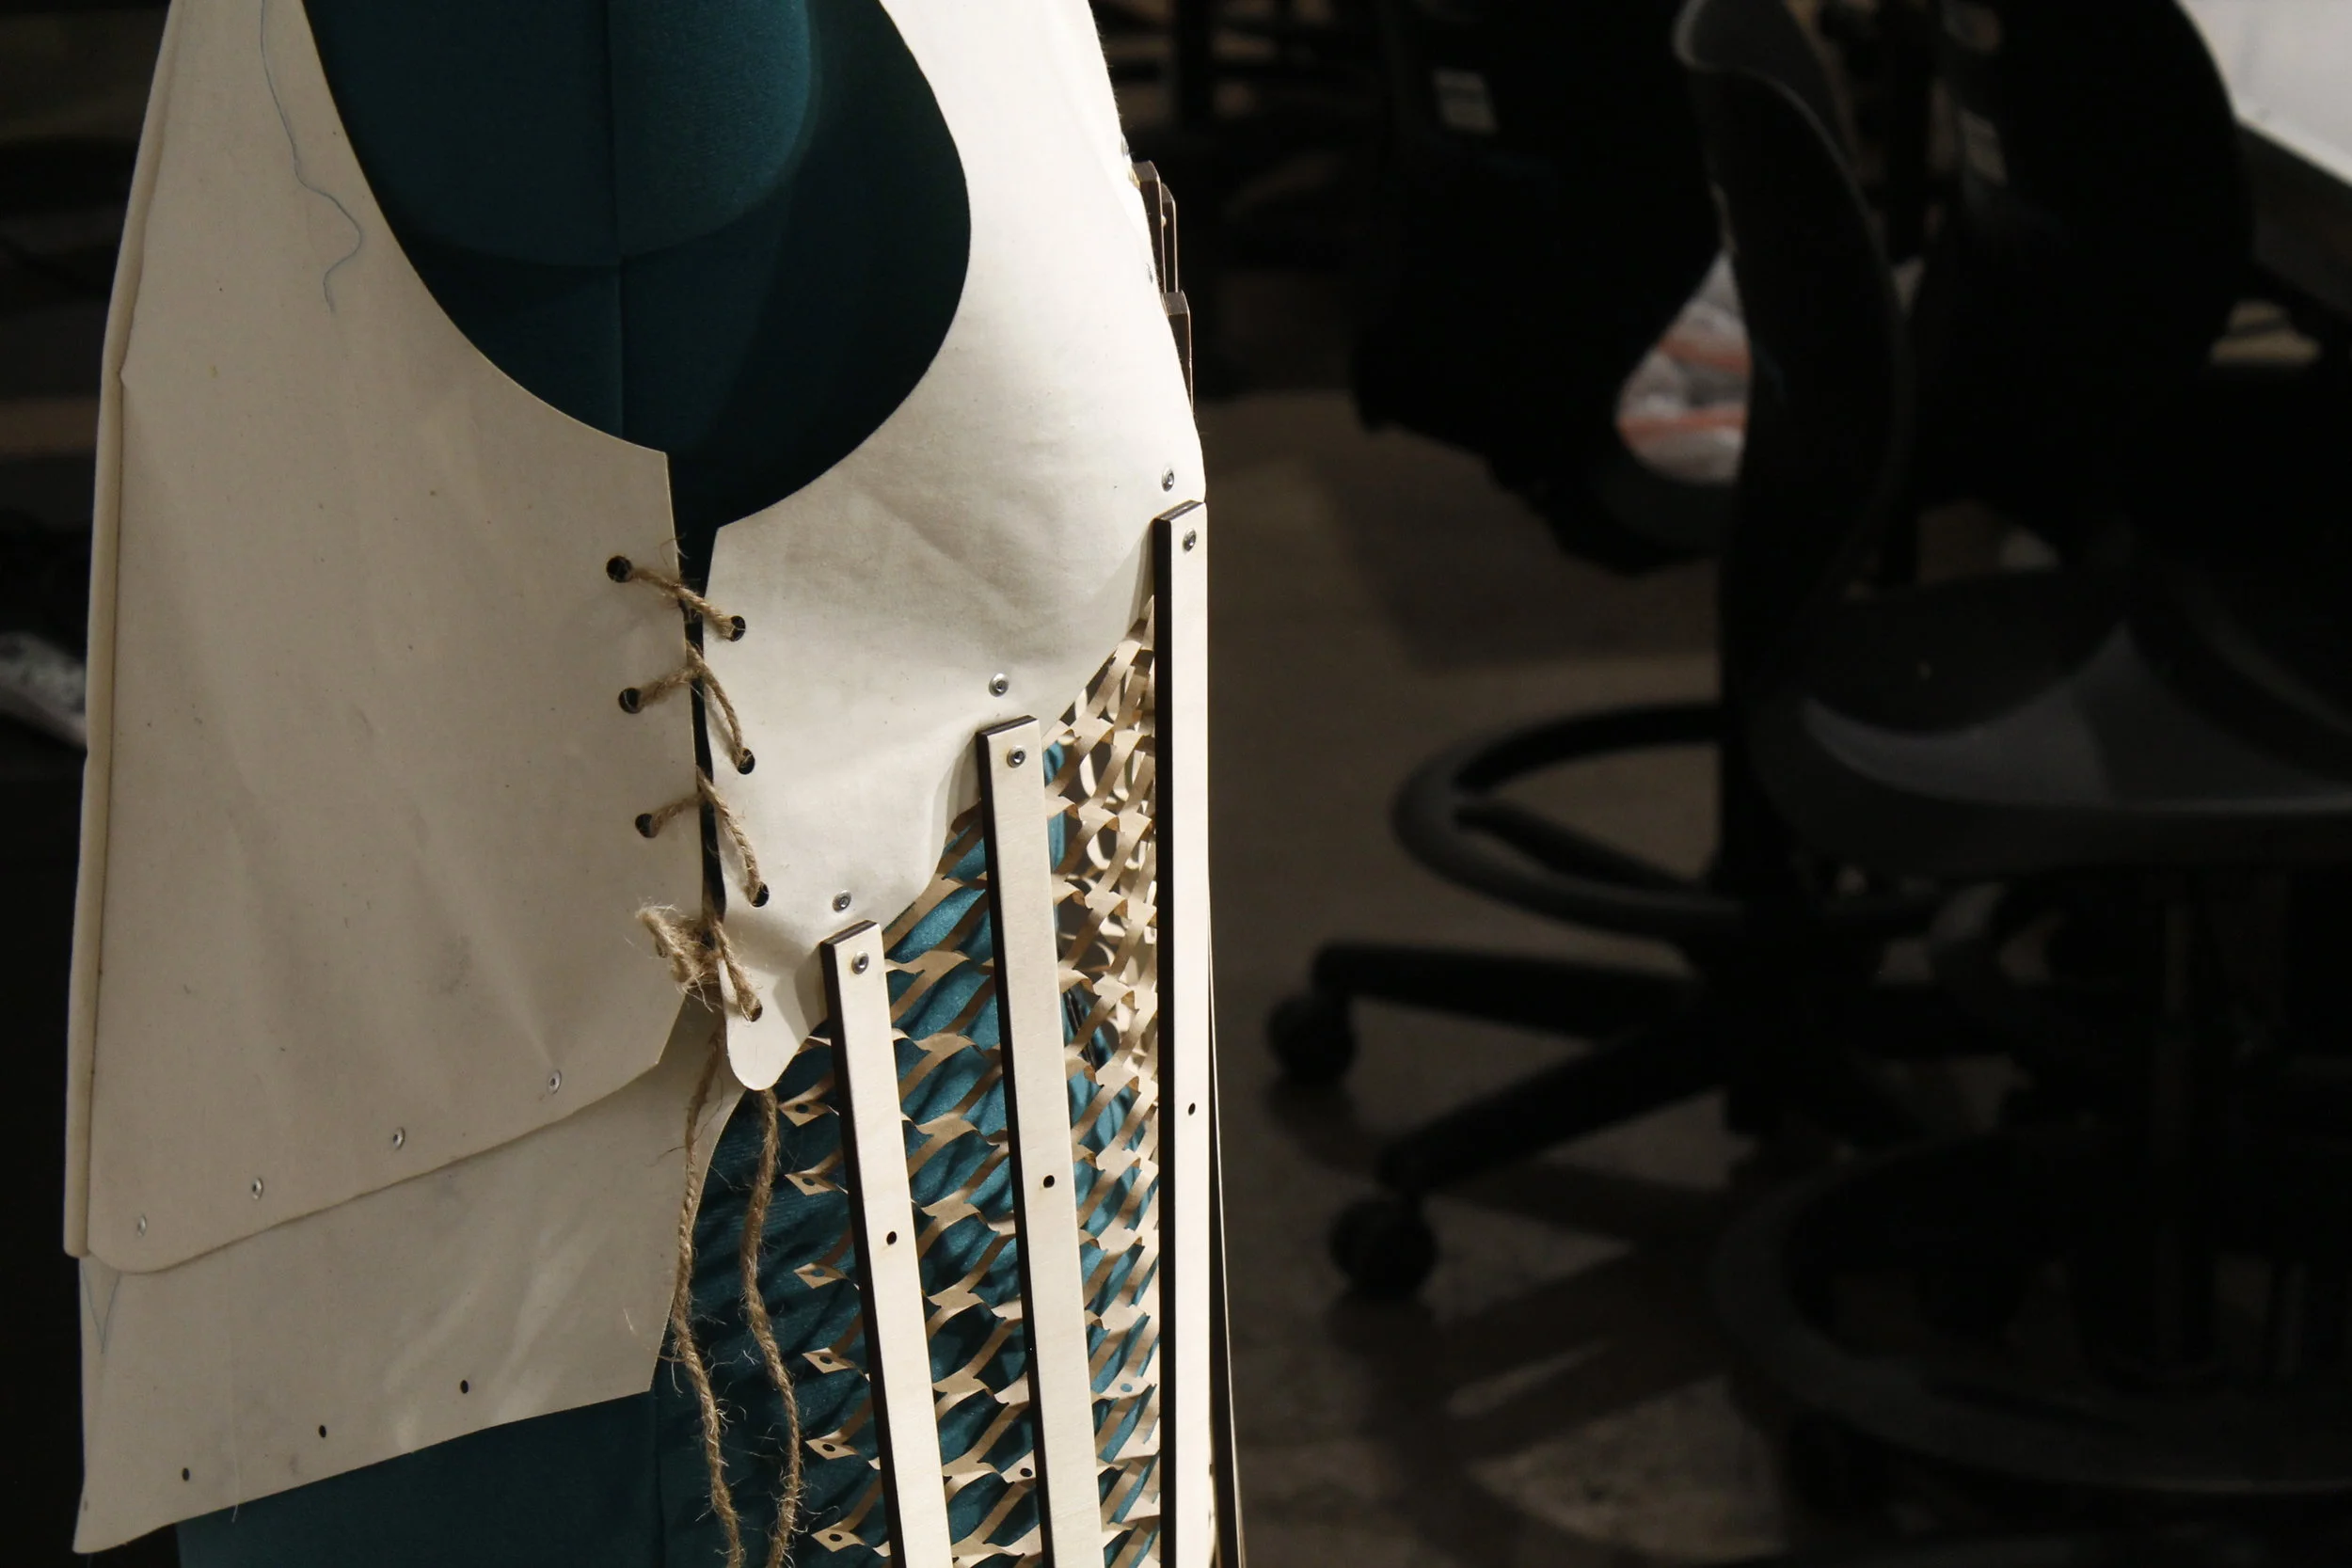
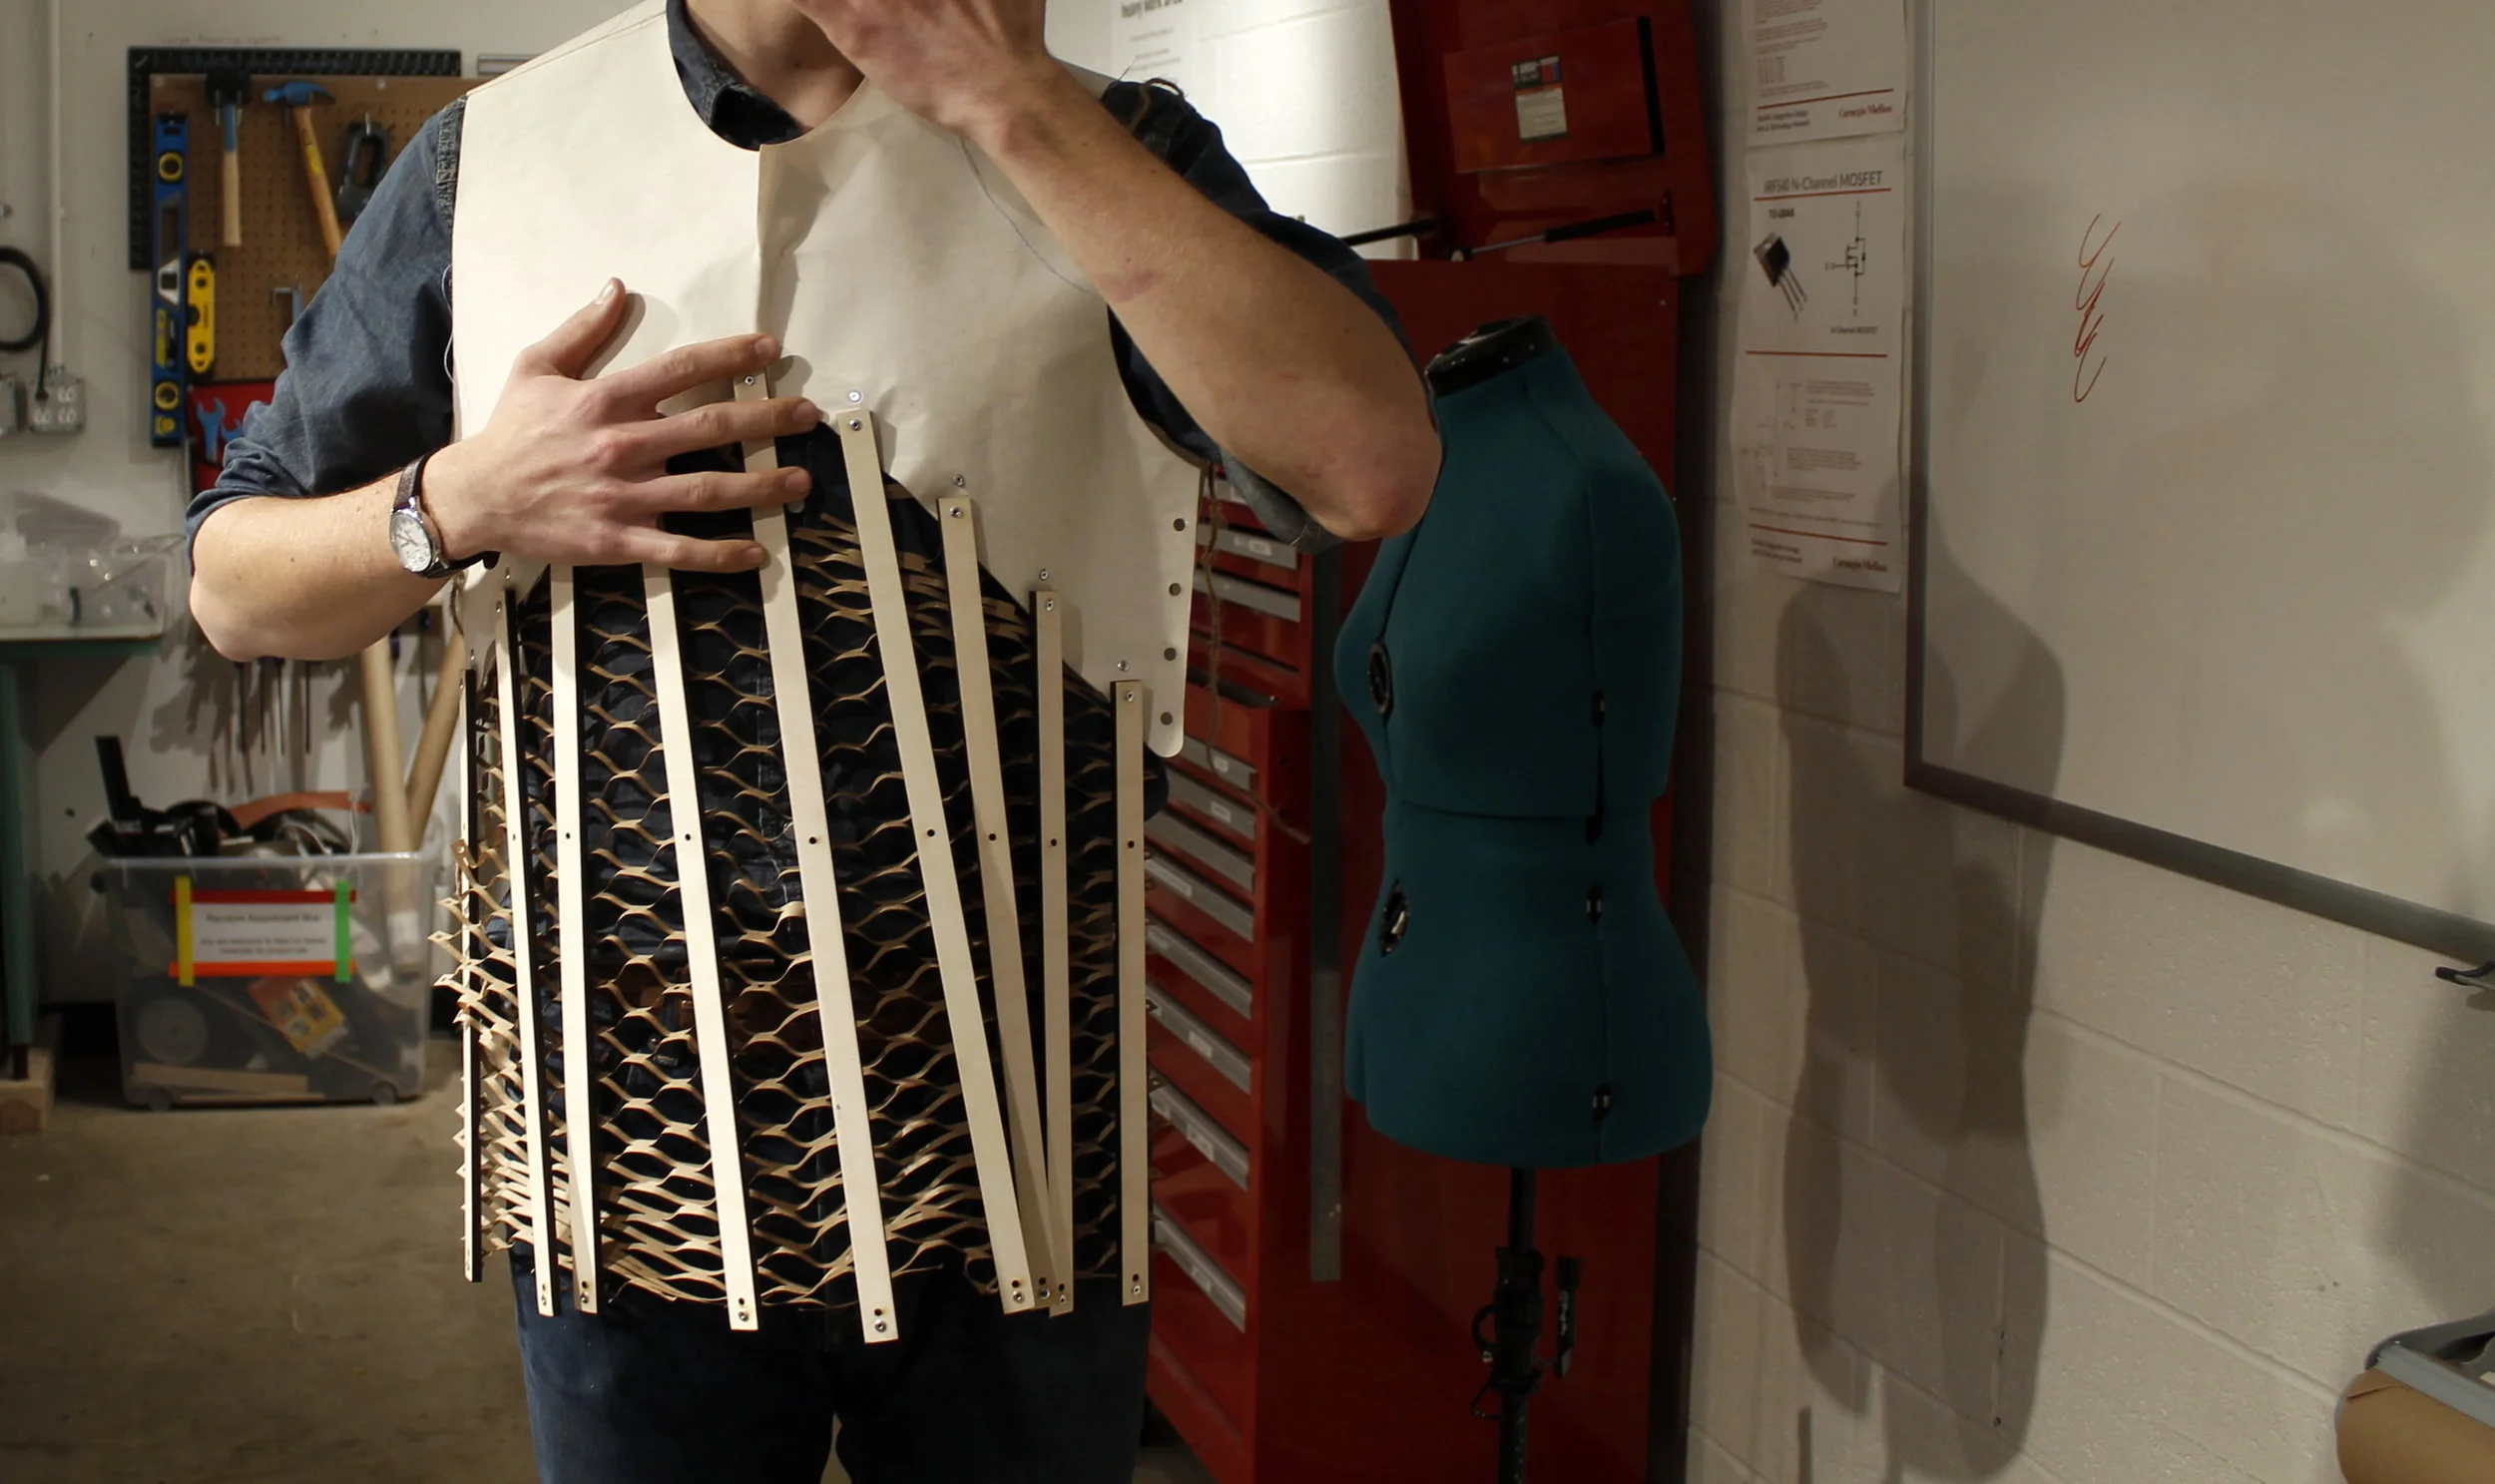
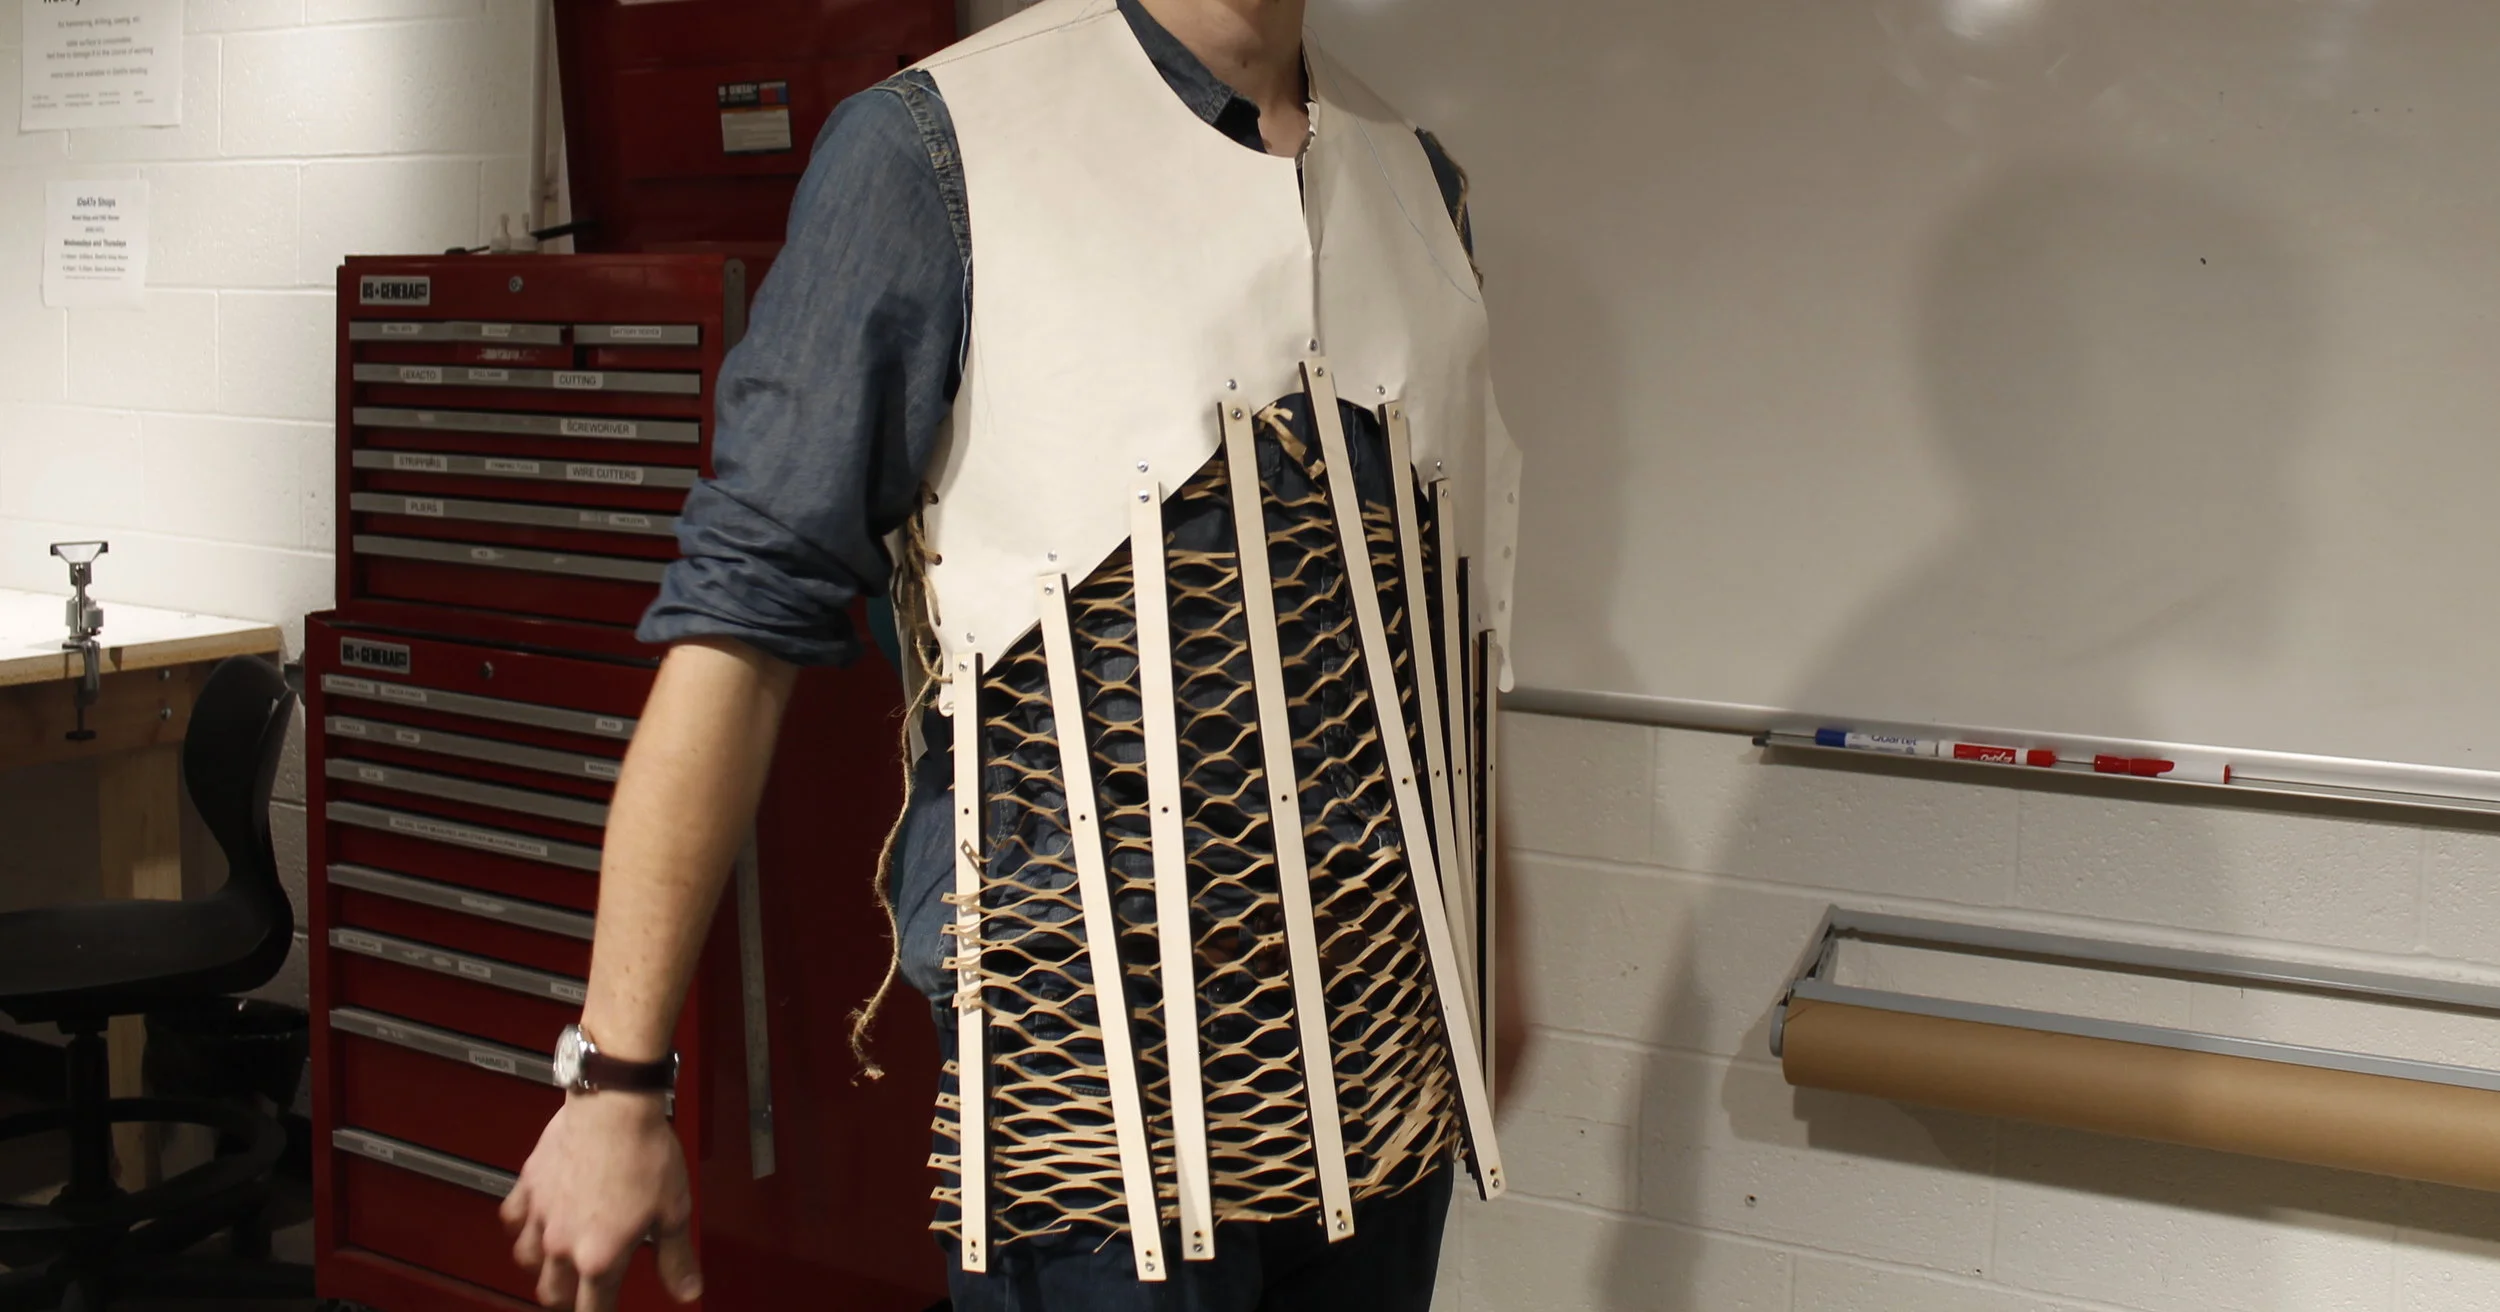
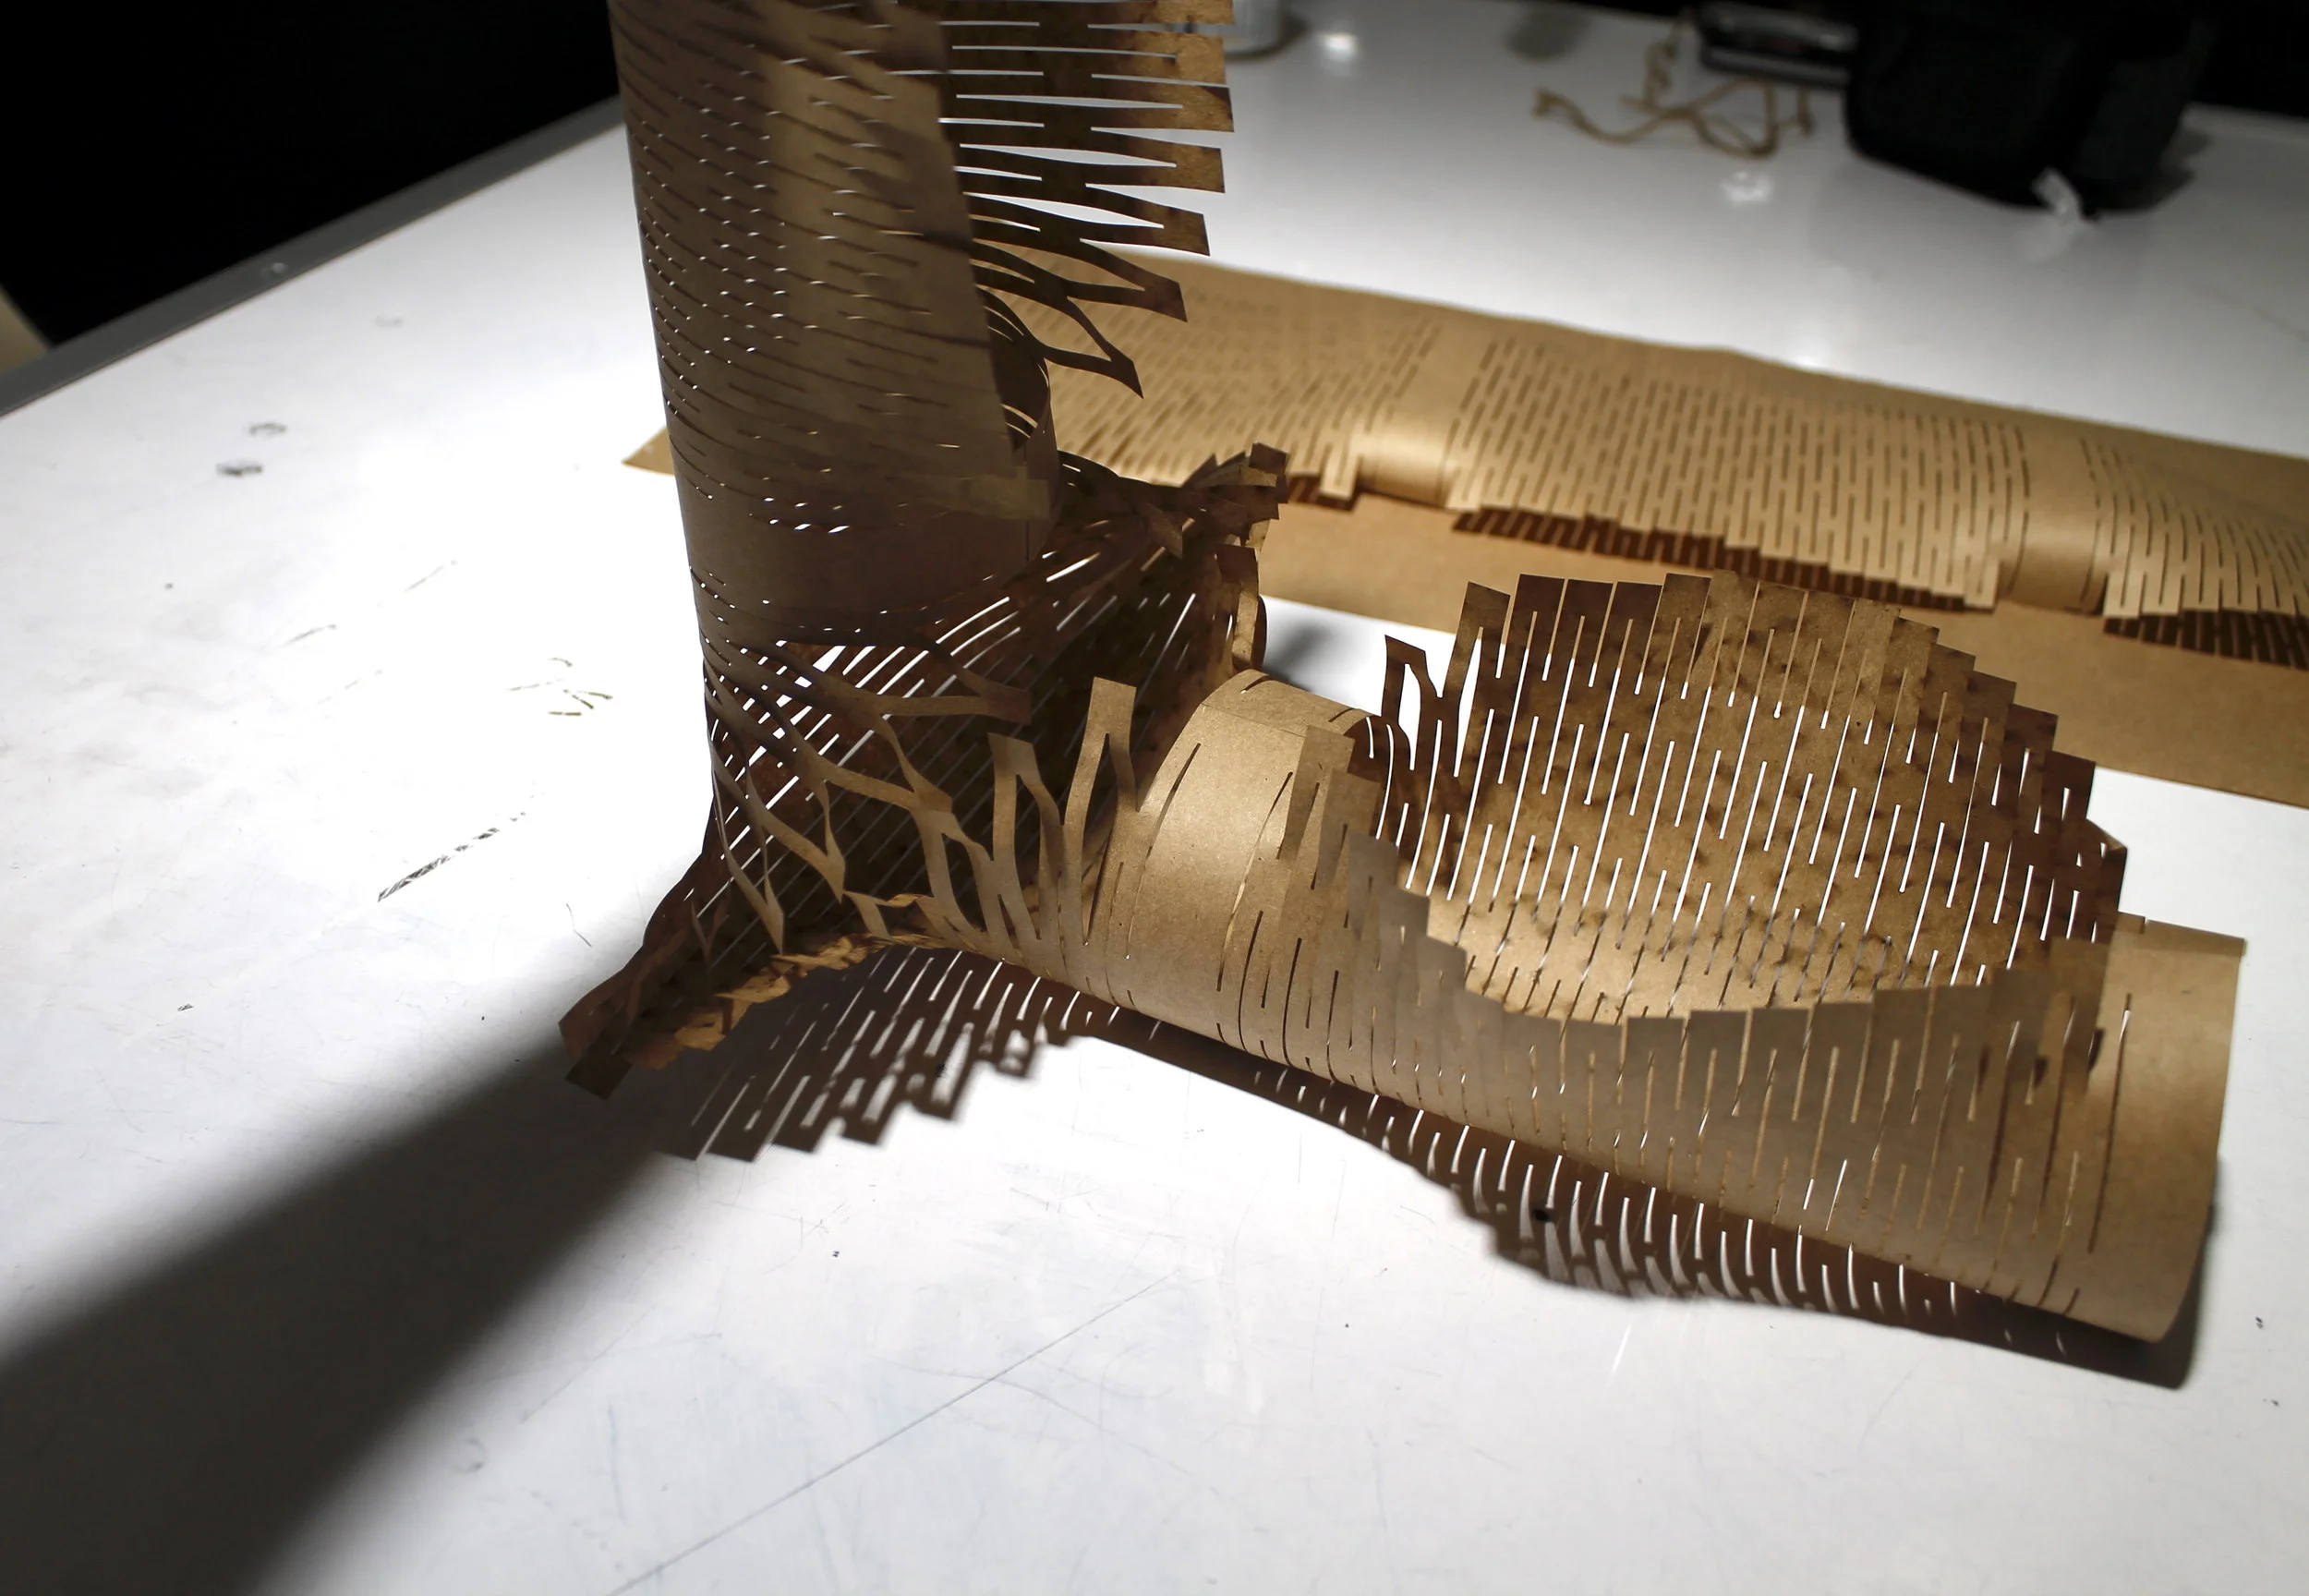
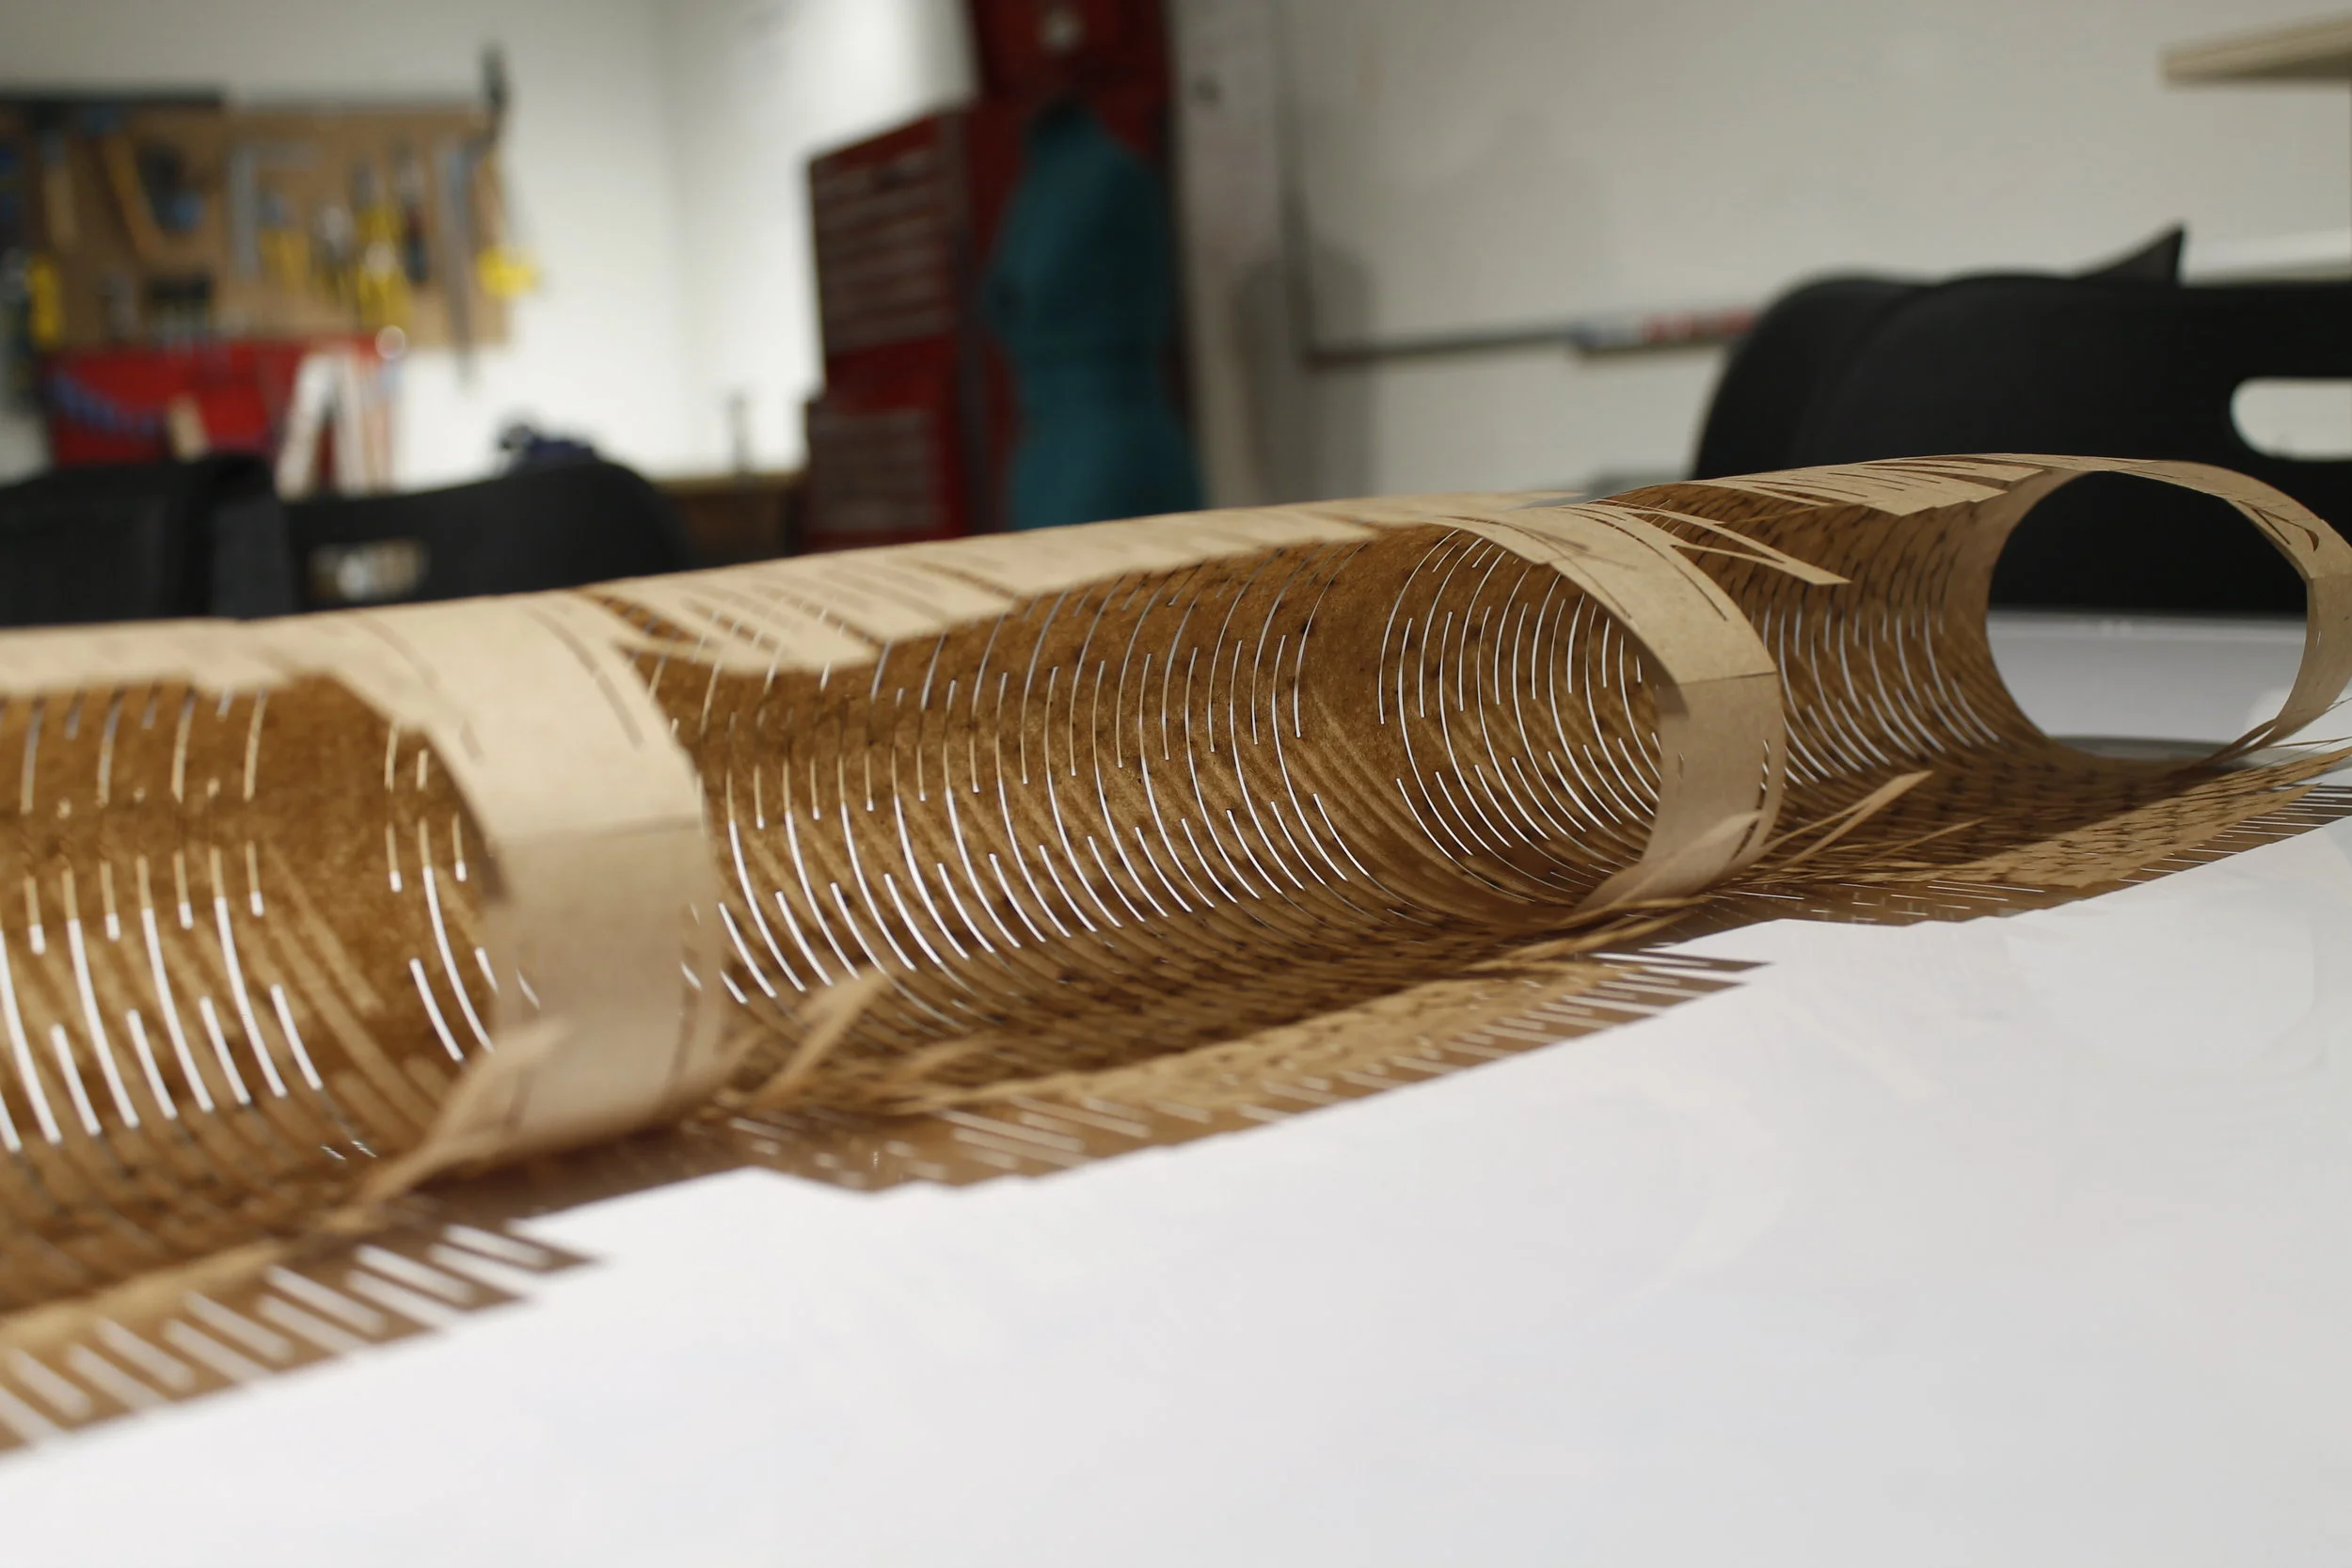
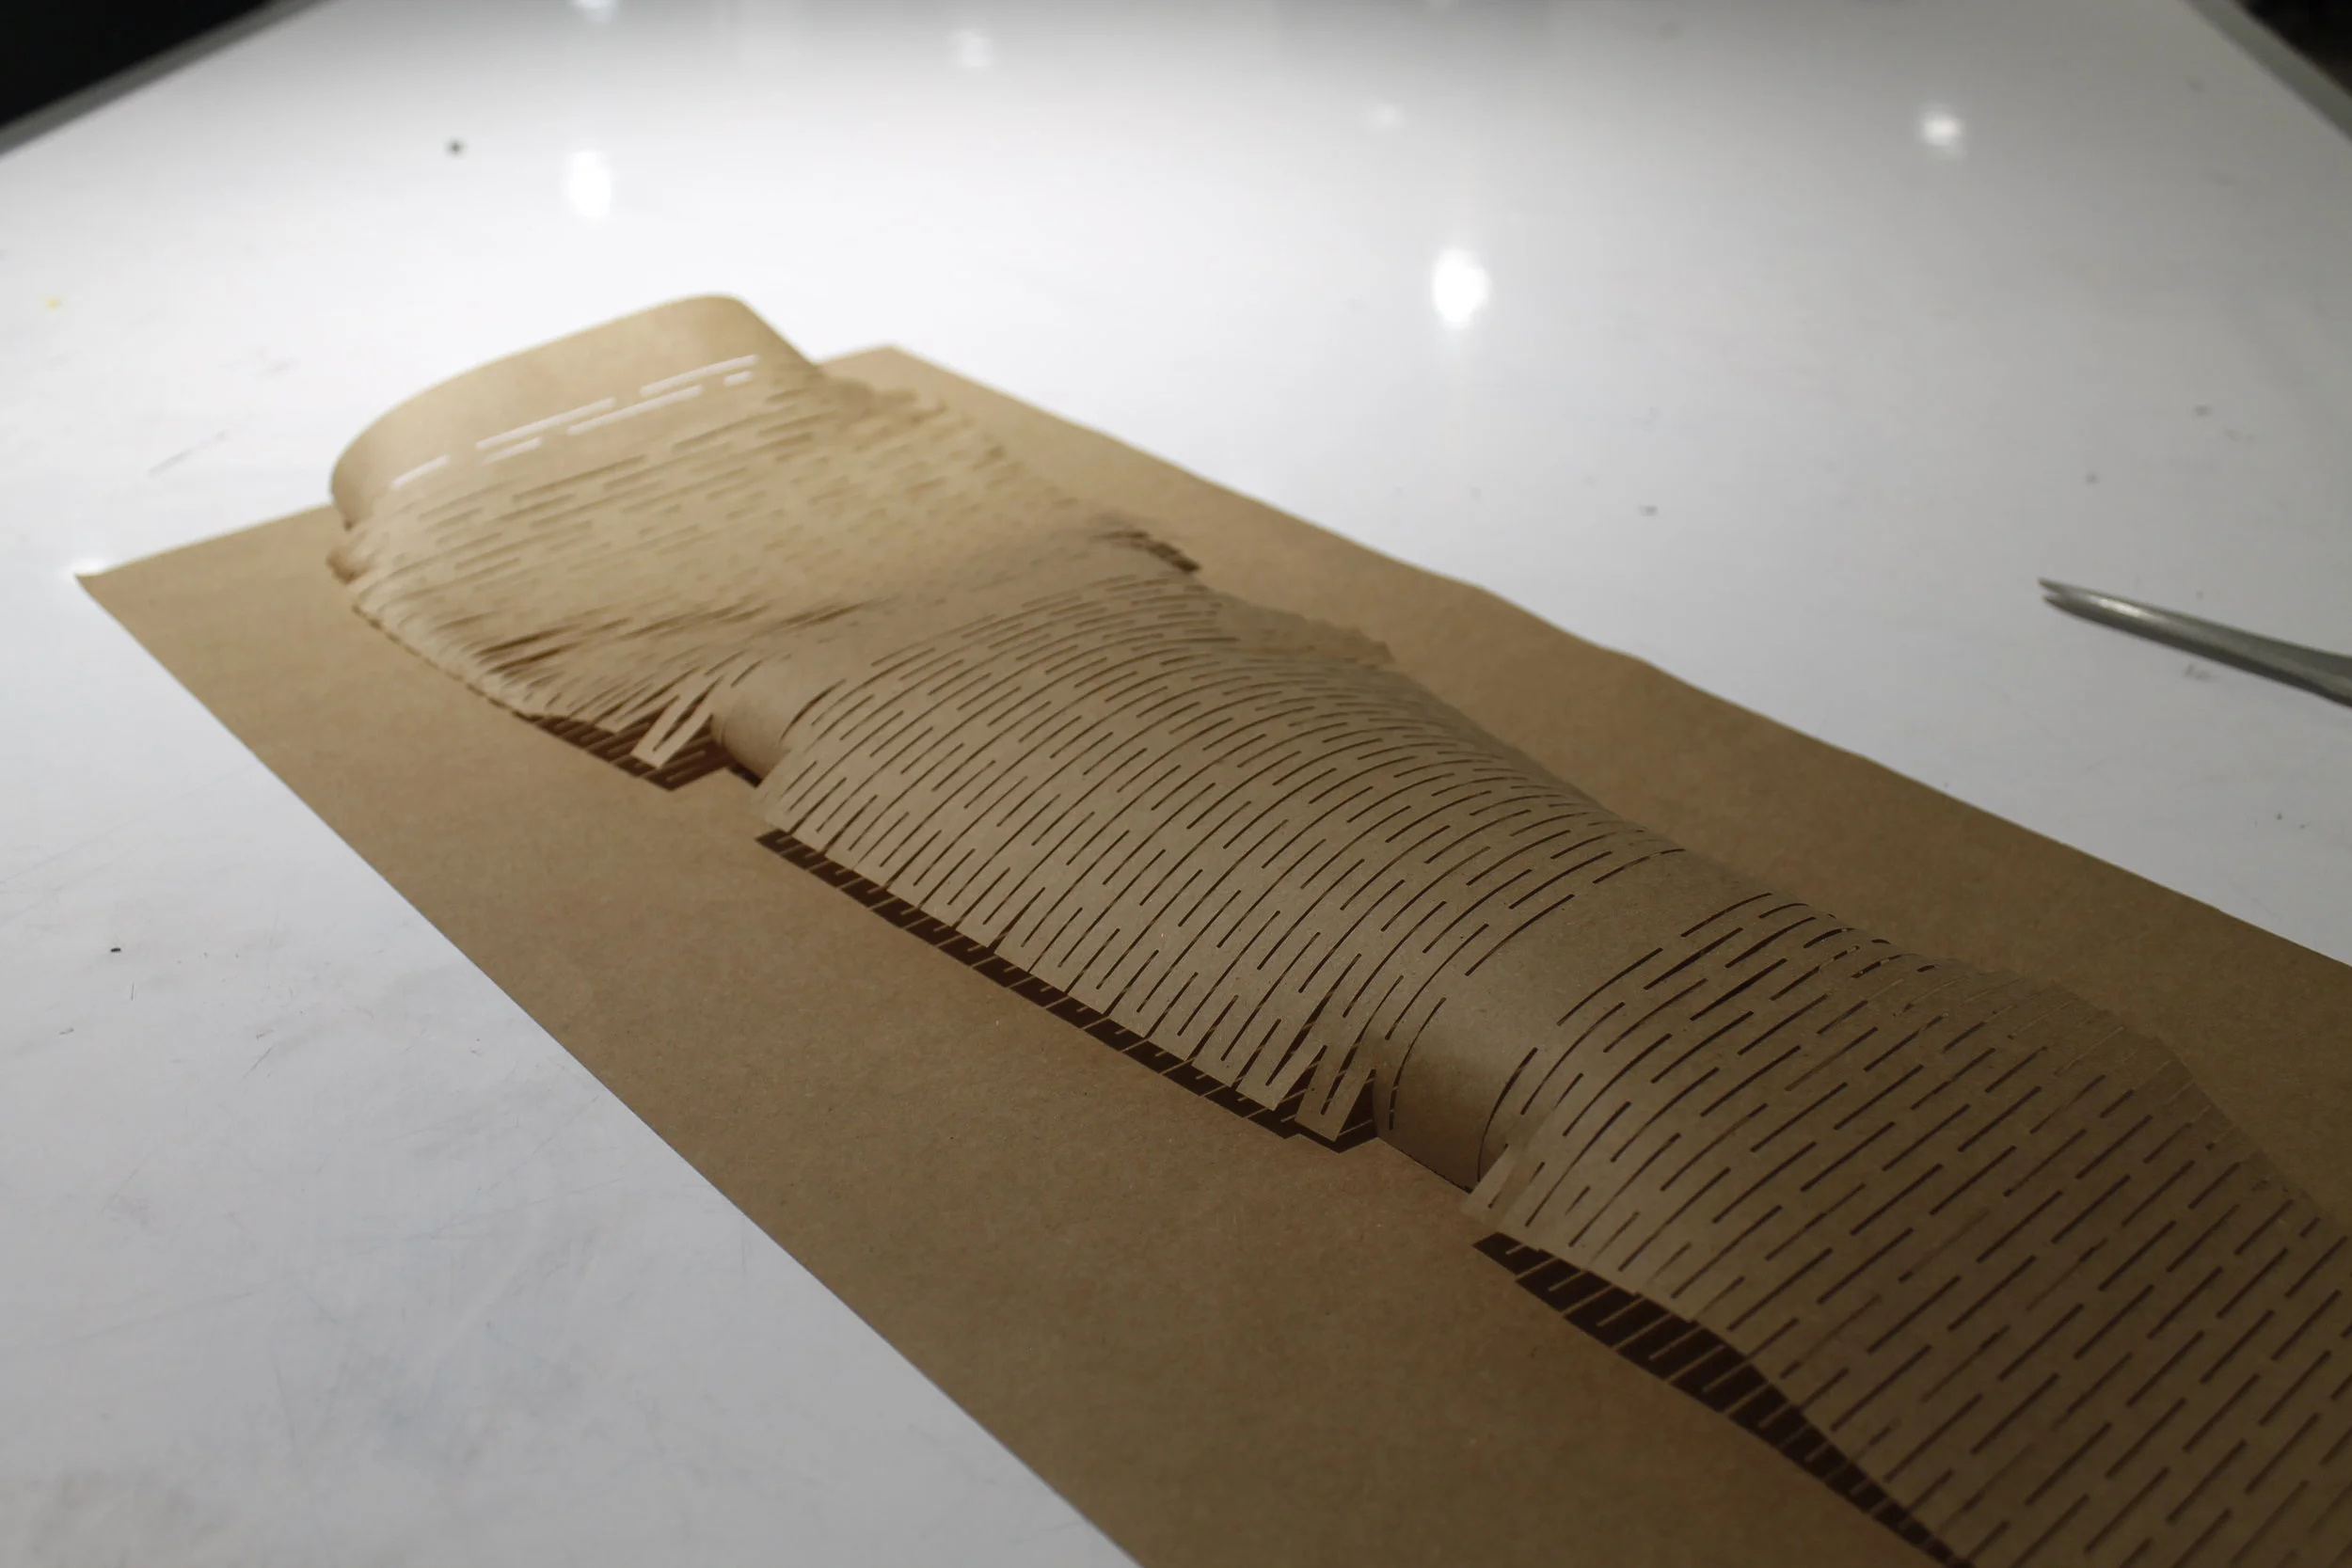
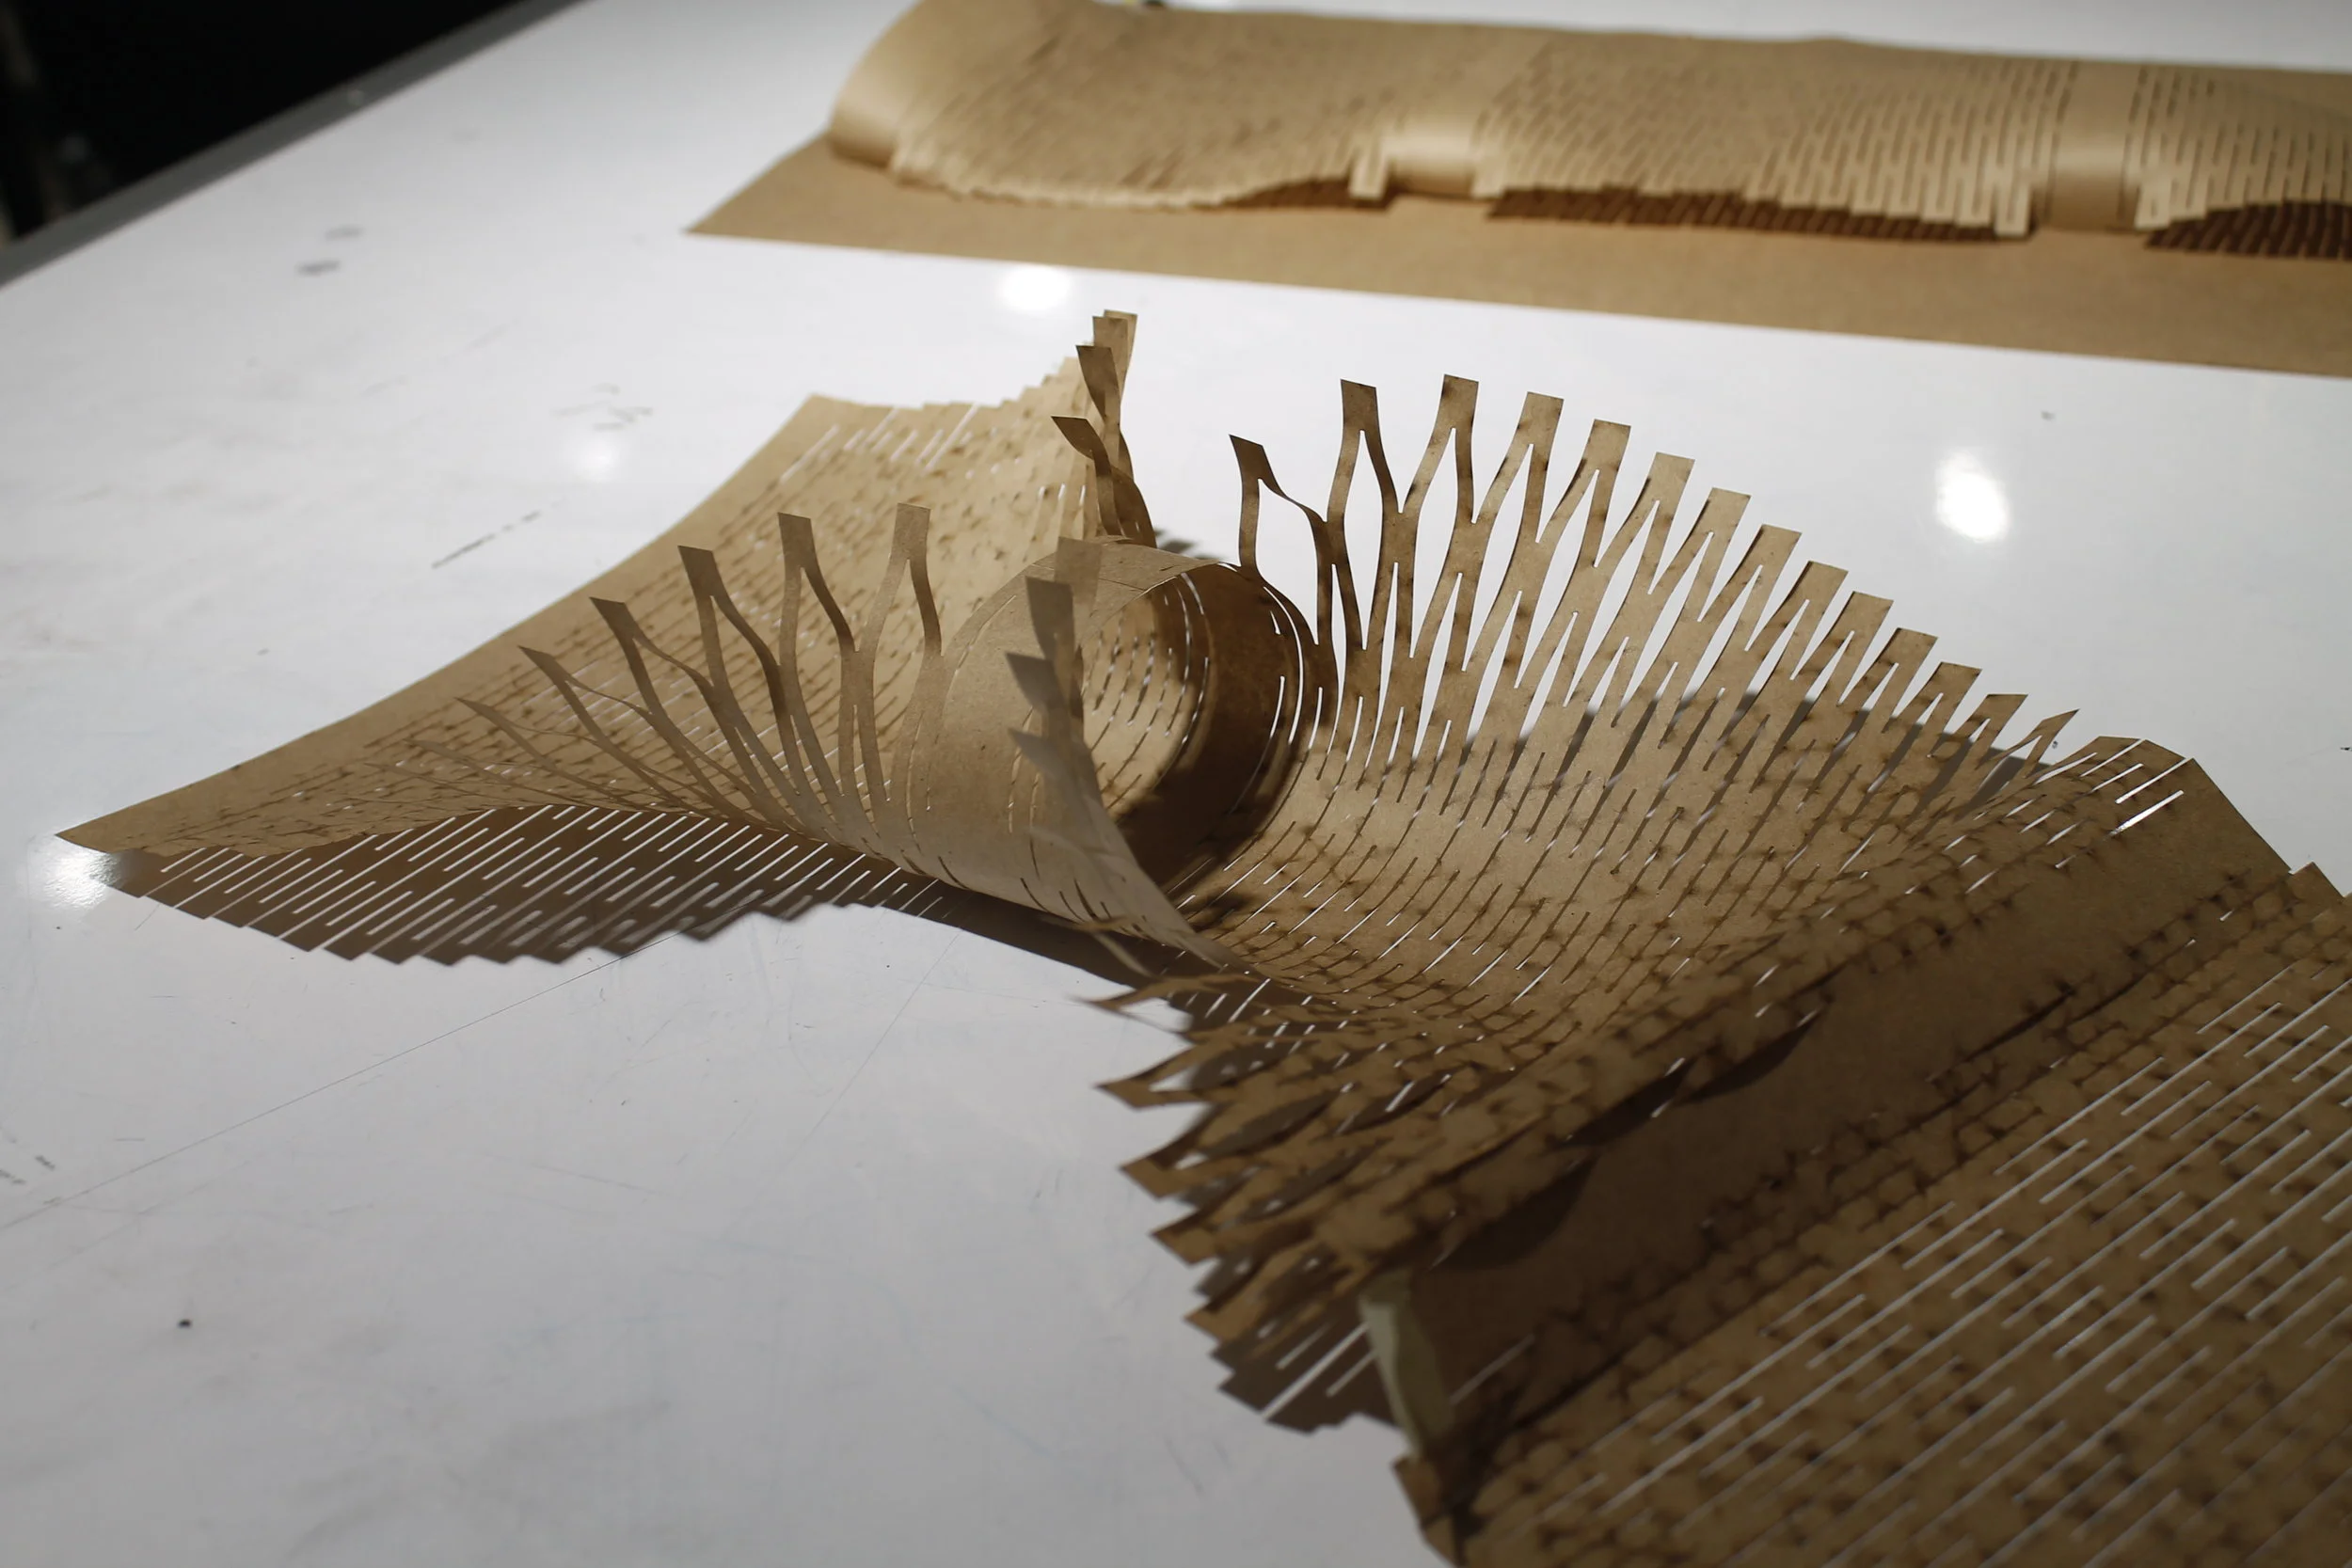
I developed a method for creating gills by cutting and layering paper or stiff fabric onto a particular panel of the garment. The horns were made to emerge from the collar by slightly changing the collar pieces.

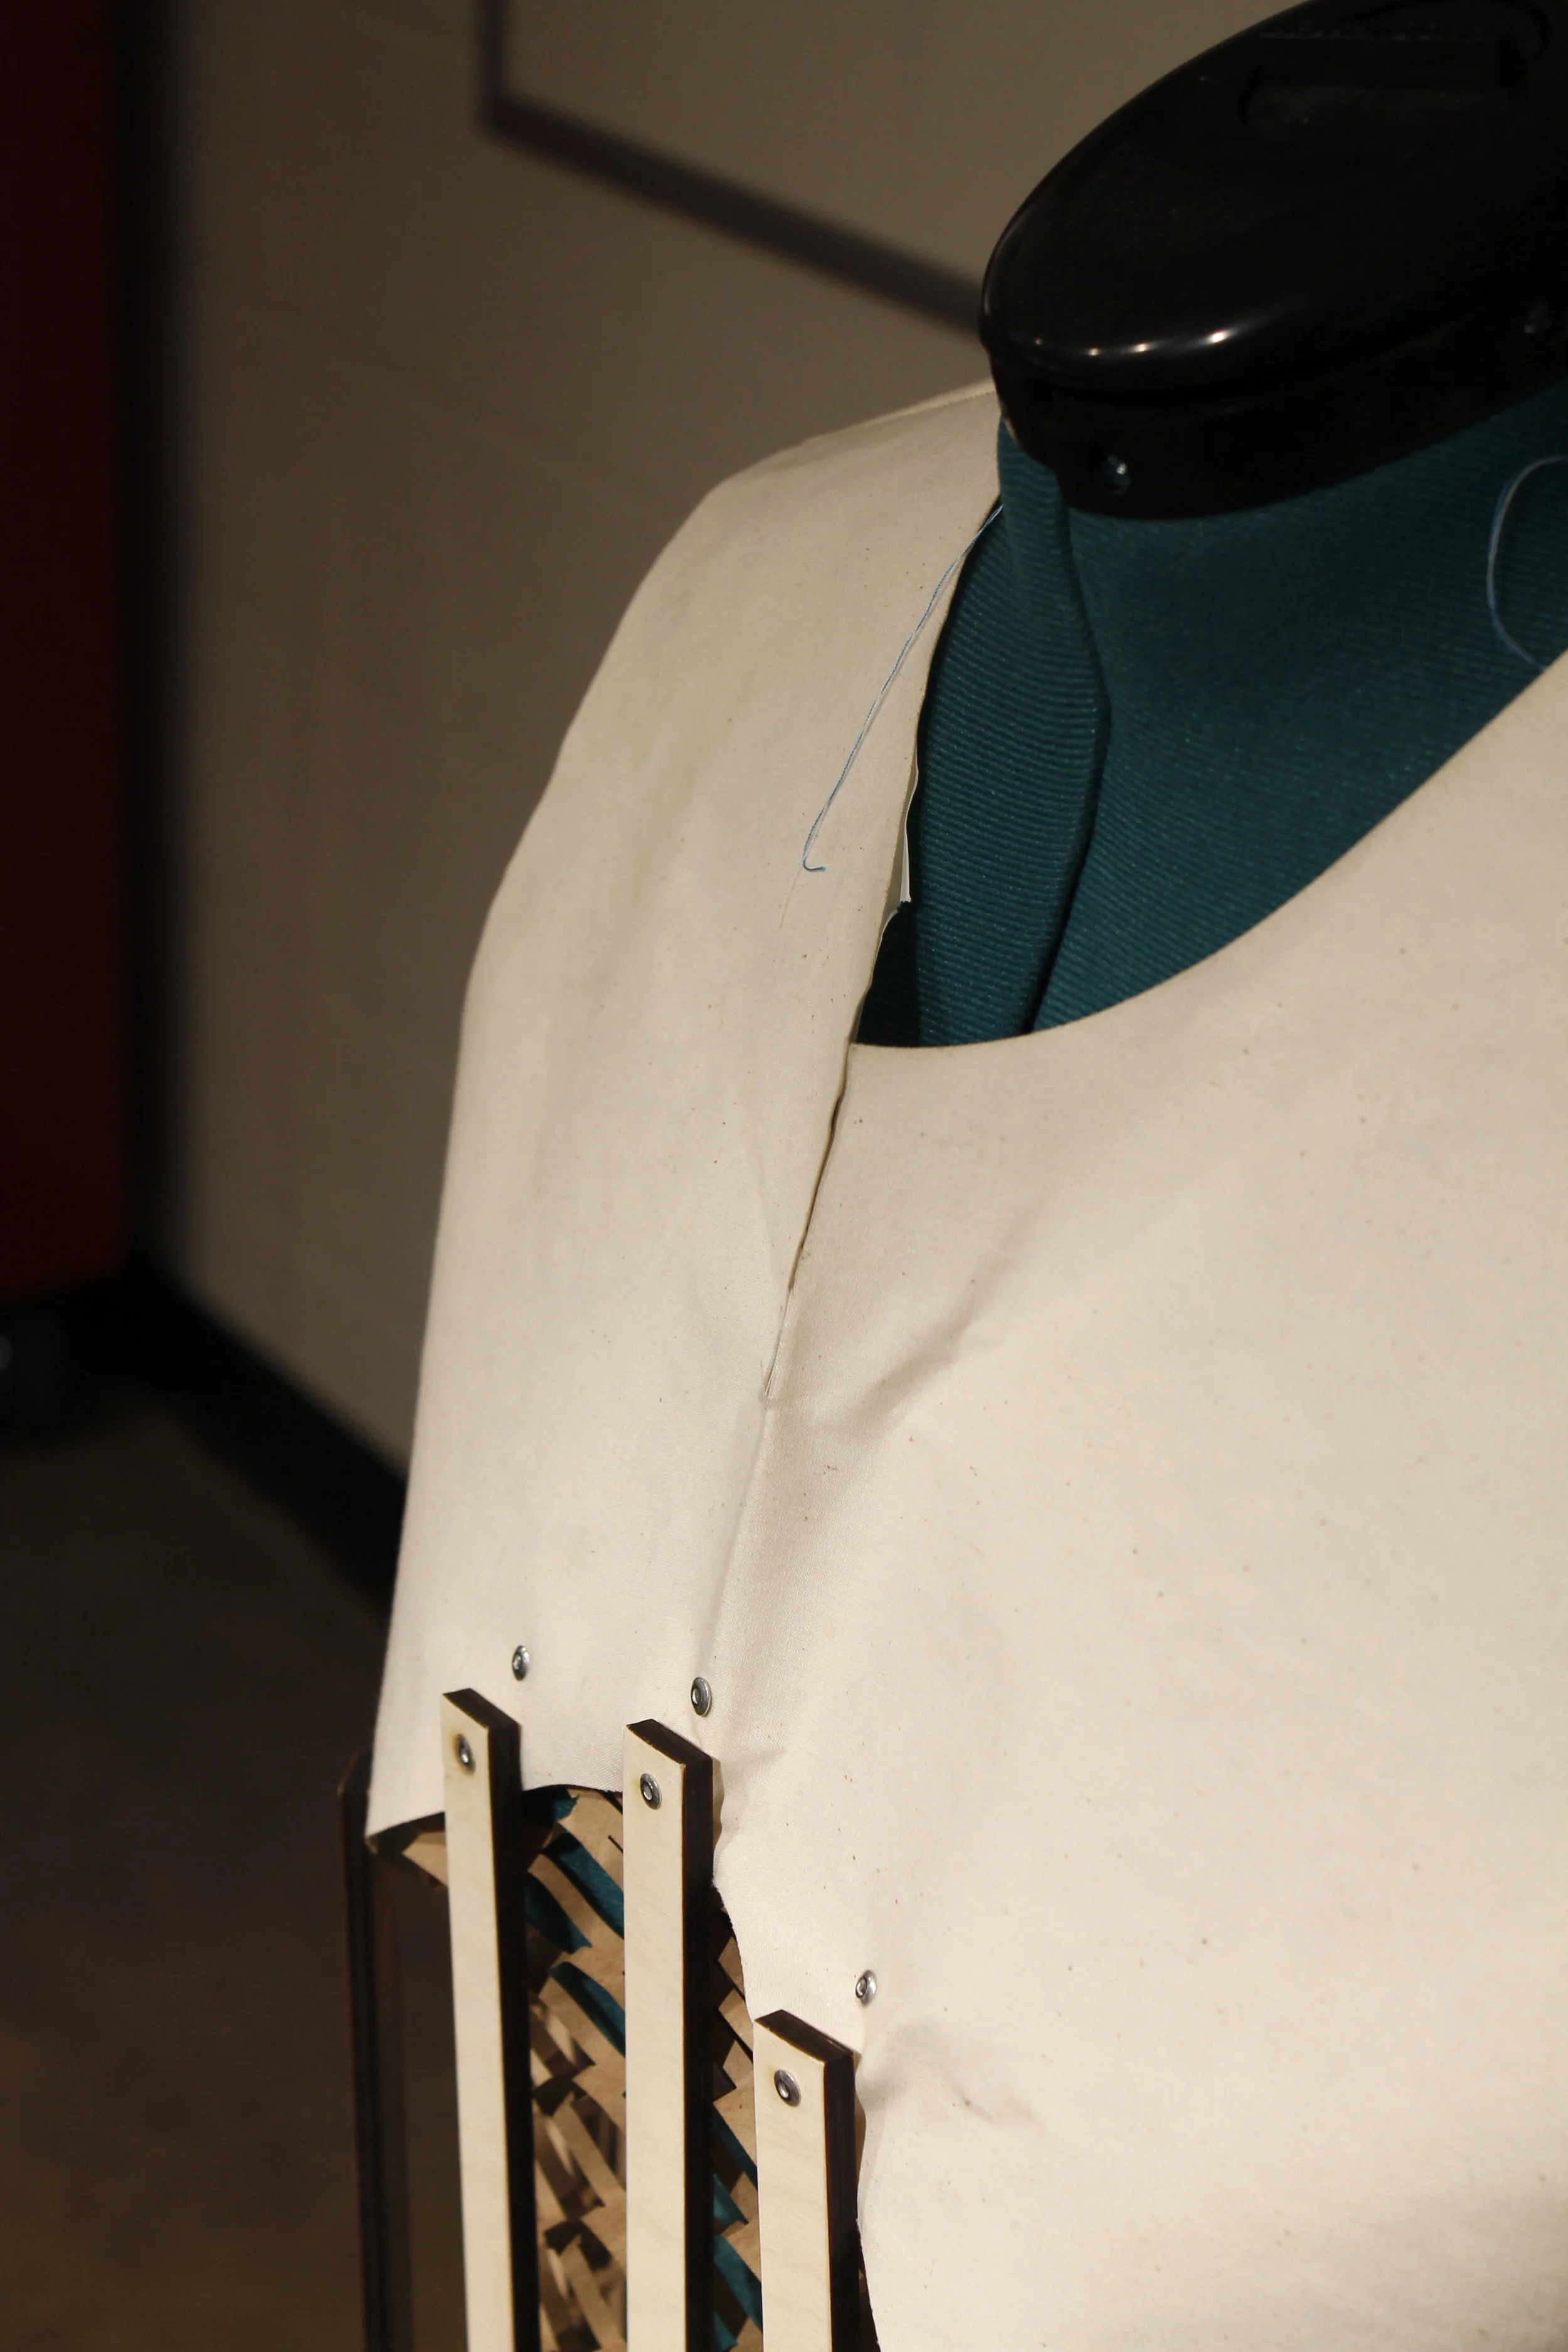
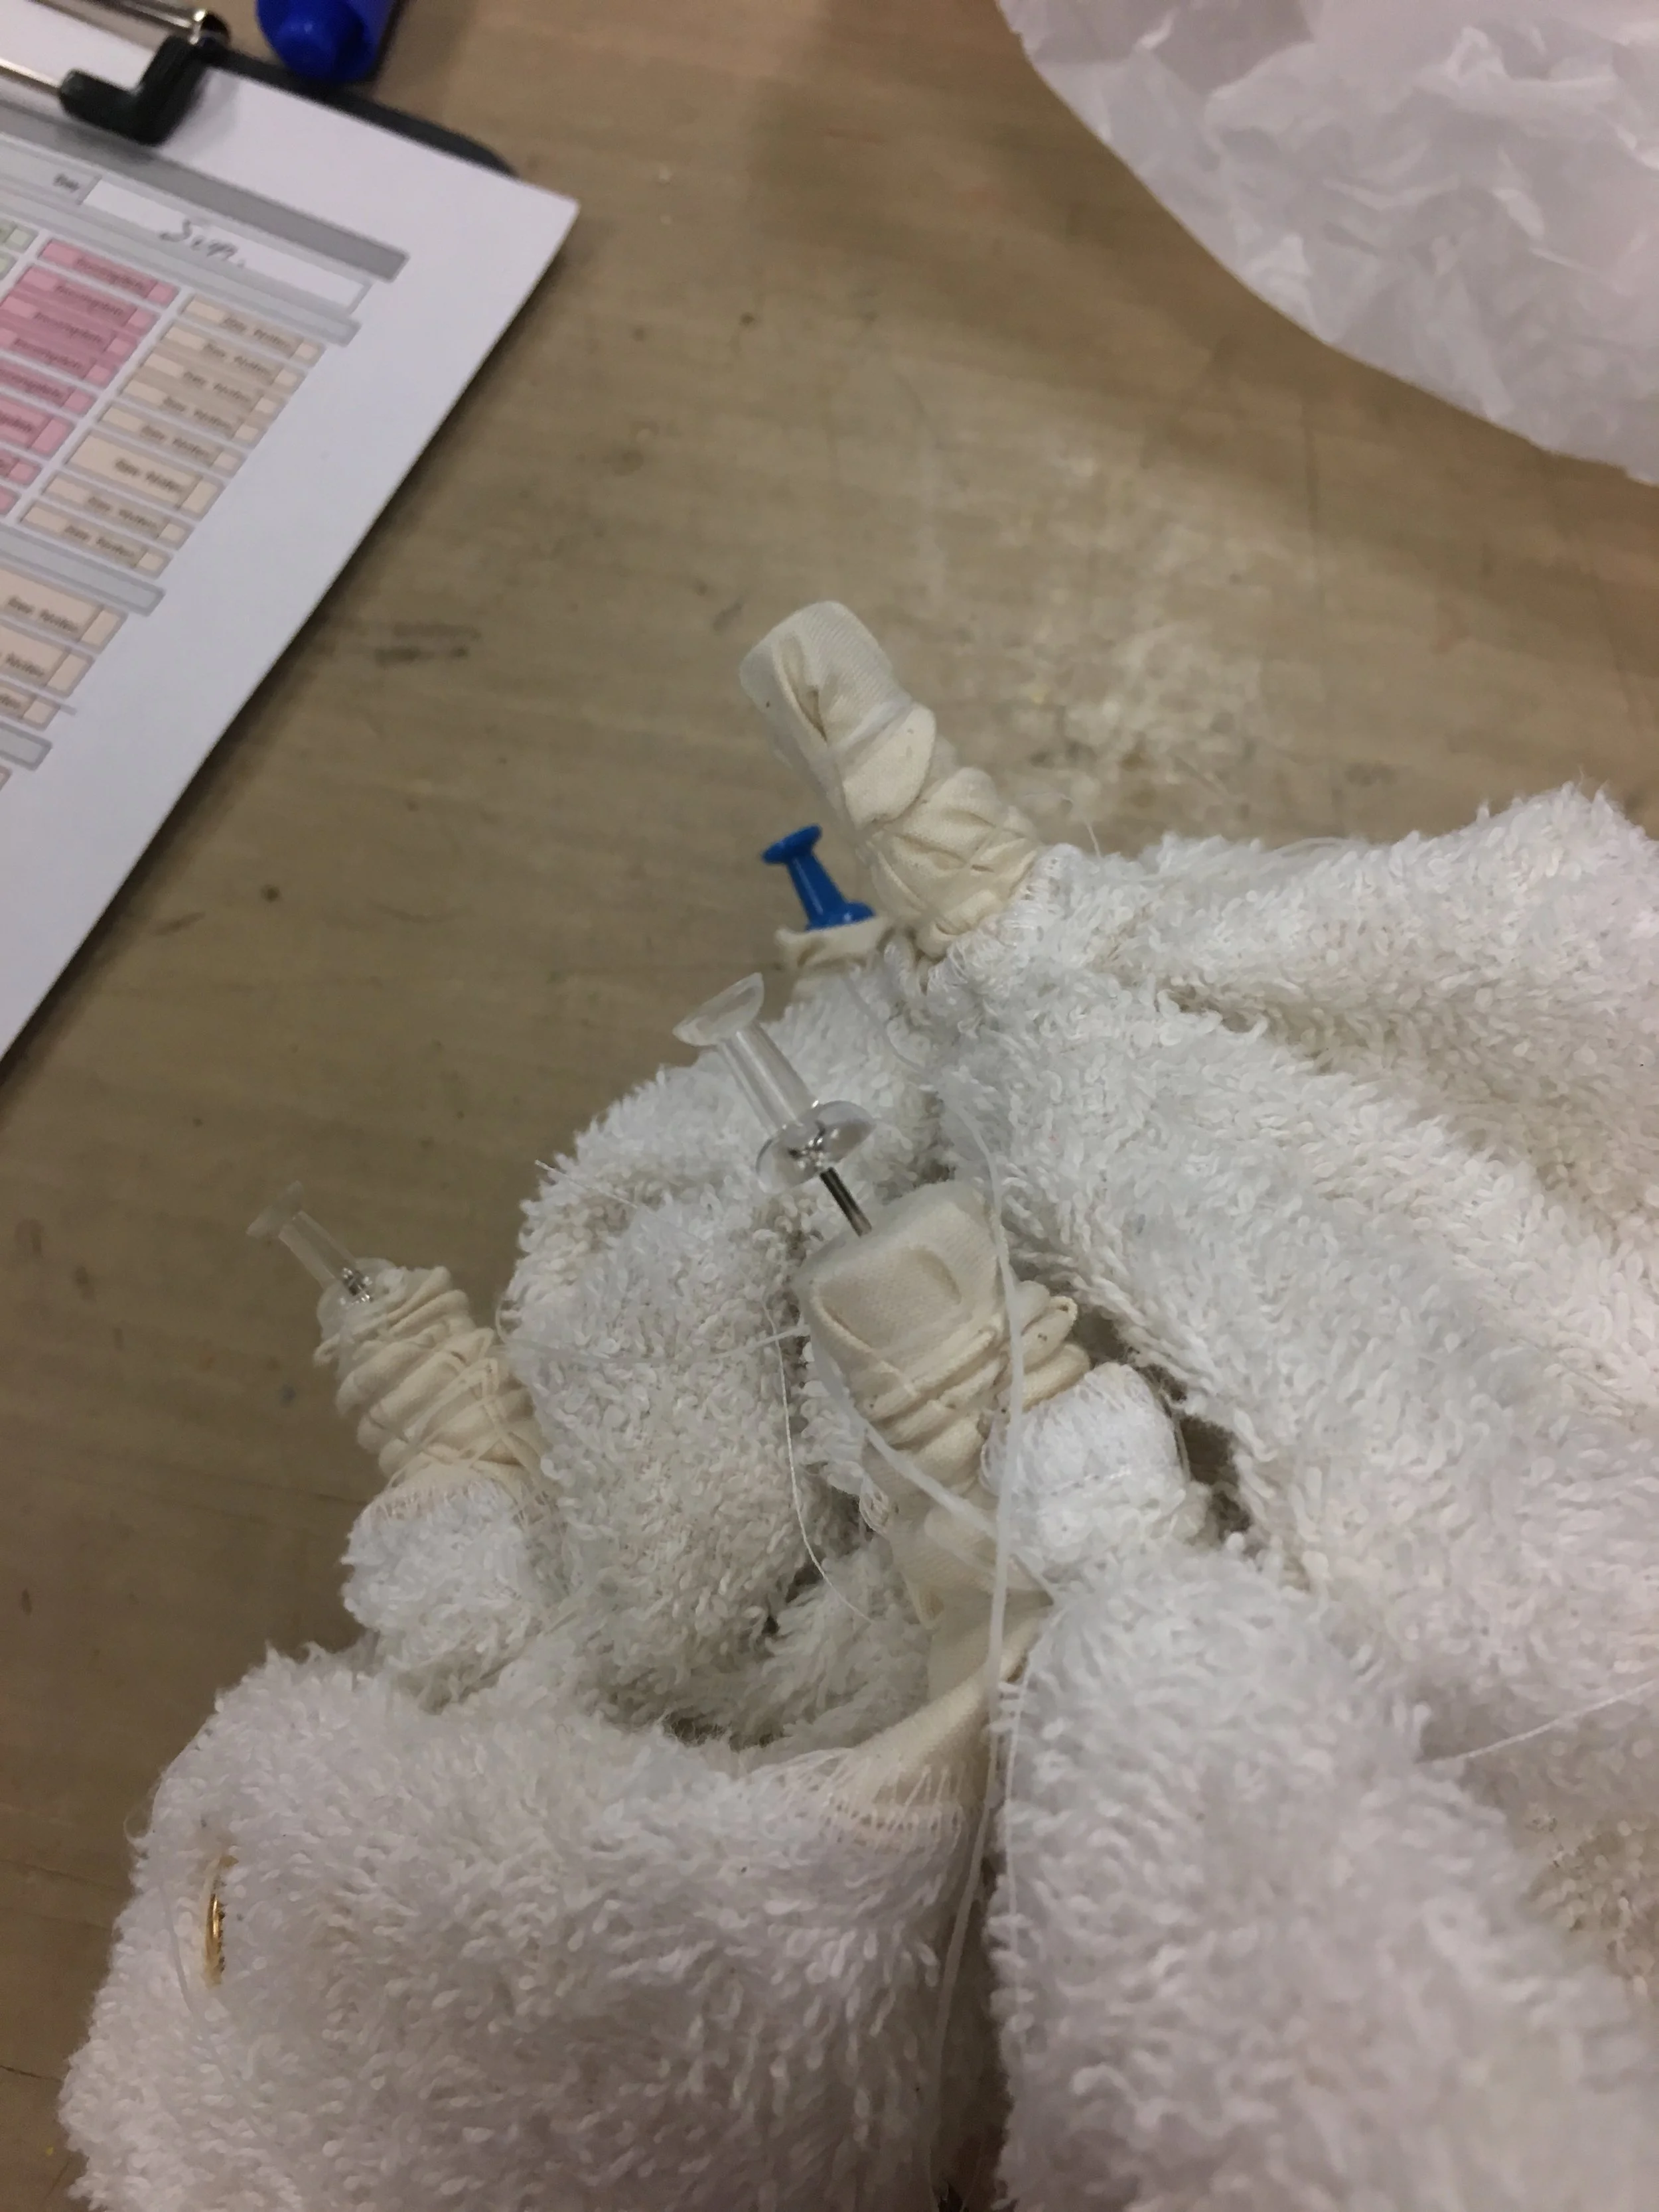
I was glad to sea that the rough mock up looked something like a pea coat, but was disappointed that the great diversity of materials in the garment meant that the form got distorted and wrinkled in certain areas.


Shoulder Piece and Other Details

The net is held with snaps to the breastplate

The net is held with snaps to the breastplate

Have been working on details for the lobster look. The most significant new element is a section of plate armor designed for the shoulder — this was prototyped in watercolor paper, the final material will most likely be leather.

In addition I spent time making the net on the chest more robust, by changing some key dimensions and designing the net so that it snaps on after cutting.

Papier-mâché Helmet

To create a working prototype of the diving helmet for the coral diving suit I decided to go back to basics and use paper mache. I stated by modeling the overall structure in Fusion 360. To create a base skeleton, I filled in the interior of the helmet and sliced it up for laser cutting. After completing the cardboard skeleton I applied two layers of paper mache, then acrylic molding paste and gave the coral a coat of paint.

The surface finish was far from perfect but it gave me a good sense of the aesthetic quality of the current piece, which was far from what I was looking for.

A large part of the goal of this prototype was to find a way to make the helmet wearable, so I prototyped a cardboard collar that distributes the load of the helmet onto the shoulders.

Vacuum Formed Paper Coral

Screen Shot 2018-11-28 at 6.57.54 PM.png

Spending this week trying to finish the coral diver look! Lots to do for this — started by focussing on the coral growing off the broken diving helmet.

After MANY failed iterations I decided to use a watercolor paper for this detail because it is easy to manipulate and, when soaked, can be sculpted into a 3d shape. I also was inspired to use paper after seeing the work of Mlle Hipolyte. Another artist who is doing wonderful work with coral forms is Meredith Woolnough.

To create the flat coral structure I laser cut the paper. To form the dye cut structure I vacuum formed the paper over a plaster mold.

More Net!

Quickly threw together a pattern to mount the netting and it actually (kind of) worked this time. Hopefully I can make the netting more robust in the next iteration.

In addition I spent time developing a pattern for a net hood the samples were supped to be experiments with bending a tube of the net pattern. More to follow.

Note: this is a garment for a man, though it is pictured on a female form in some of the images.

Netting for the Lobster look

LobsterLook.jpg

Working on the lobster & lobster cage armor.

My initial prototyping was focussed on the wood mounted to the chest of this form. Initially I started by trying weaving techniques to mount the wood pieces into place. After experimenting in my Structural Weaving project I decided that weaving wouldn’t provide a robust solution without an extreme commitment of time.

 
0ca28446e51c144639740838d2a33fe4 (1).jpg

I stumbled on a dress with net forms designed into it and realized I could solve two problems at once: using the laser cutter I could cut my own net structures and also design the net with mounting holes so I could mount wood onto the form. I quickly laid out a number of samples which you can see bellow. I’m still working on mounding these into a garment pattern.

The Sea Horse & Beach Swimmer Outfit

Screen Shot 2018-11-24 at 4.14.05 PM.png

The goal of this look is take a simple one piece swim suit and a towel that might drape around the neck and build onto it the textures of a sea horse. I’m really hoping to expand the towel form into something like a heavy cape form. I’m really intrigued by pile and tufting techniques to give the overall garment more form, as well as shibori dying techniques to accentuate the sea horse texture.

I spent about a week trying different shibori dying techniques for this look. The first technique experimented with was clamping — I used a laser cutter to cut my own shapes for the clamps. Because I used a cotton terry cloth (towel fabric) for the dying I found that I didn’t get a very consistent result between layers. I finally settled on pole rapping technique which you can see in the photos bellow.

At the end of my week of dying I quickly developed a pattern and simple technique for the tail piece. The tail was made with bubble tea straws, rivets, bungee cord and laser cut plywood.

Portfolio

This is my first post — just wanted to share the full portfolio.